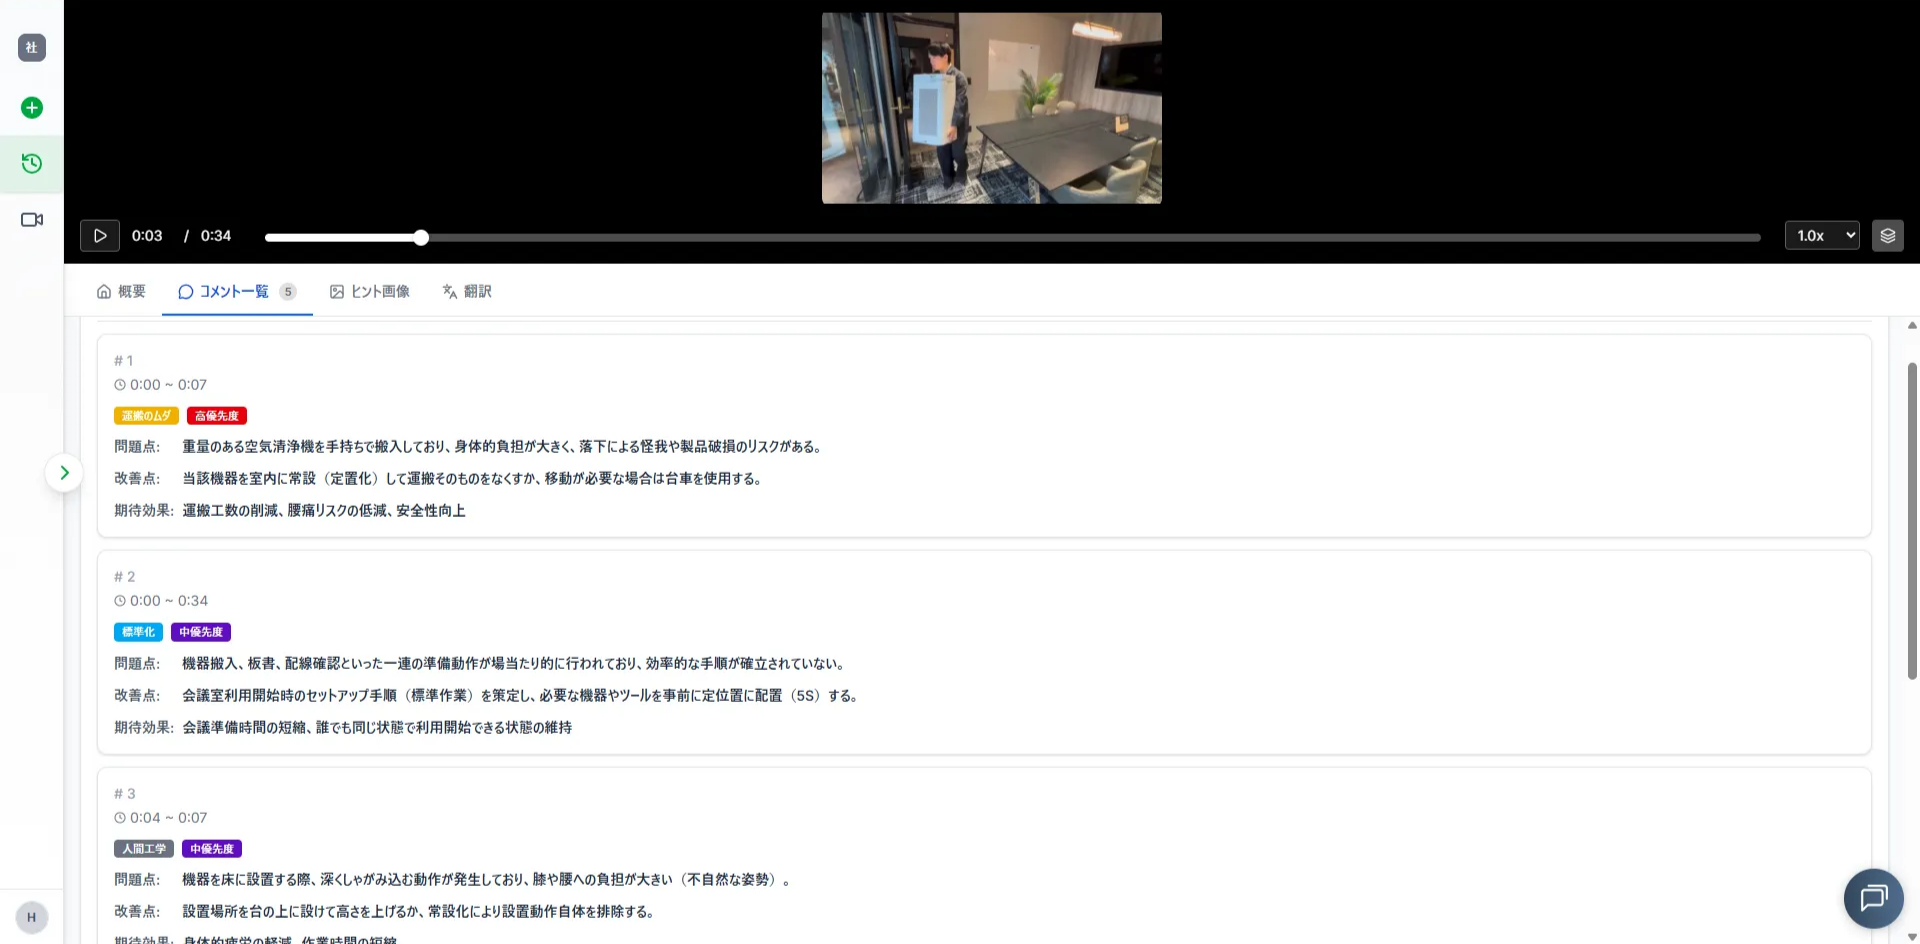
👉 By using the comment feature, you can detect "Problems" and "Best Practices" based on IE (Industrial Engineering) methods.
💡 The image examples in this manual show the "Work Classification" screen, but the steps are the same for "Work Manual Generation.”
Customizing the Settings
👉 By customizing the settings, you can get specific or high-precision outputs tailored to your needs.
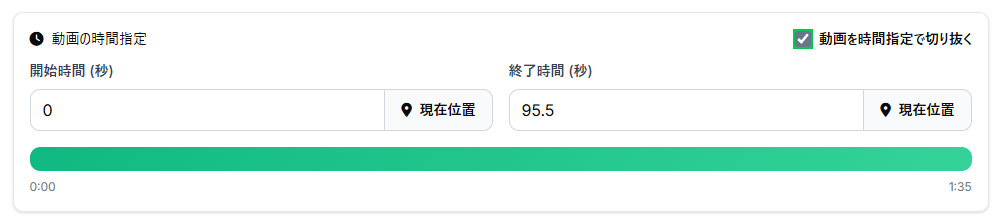
Specifying the Video Duration
👉 You can specify the video duration to clip the exact segment you want to analyze.
Displaying Setup Steps
Step 1. Click the "Clip Video by Time" box.
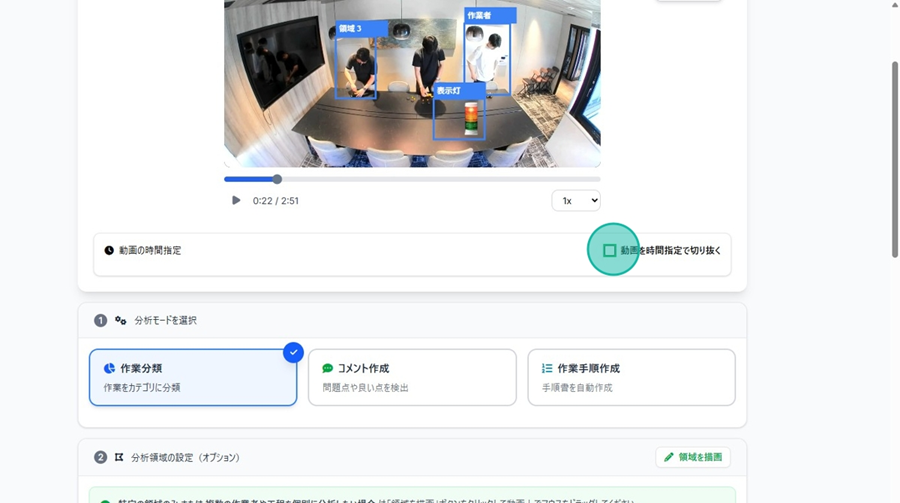
Clipping Video by Checking the Footage
Step 2. Move the playback bar and stop at the point where you want the analysis to start.
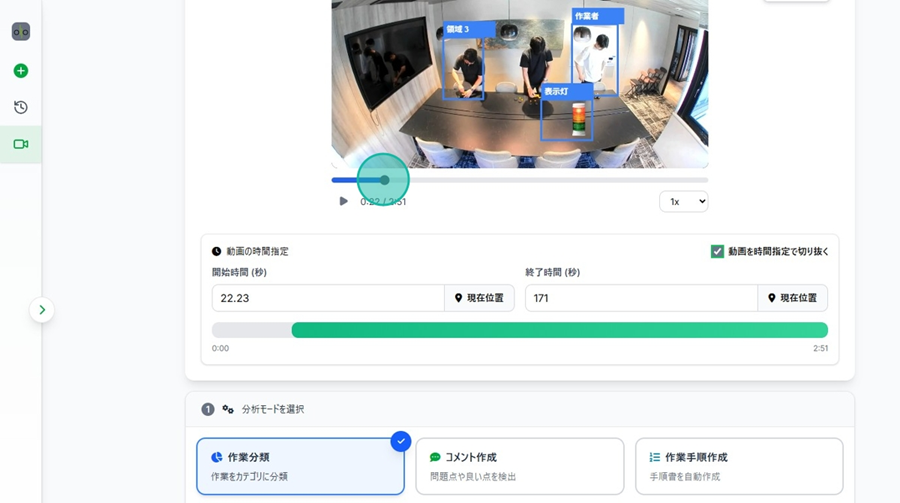
Step 3. Click "Current Position" to set the starting point.
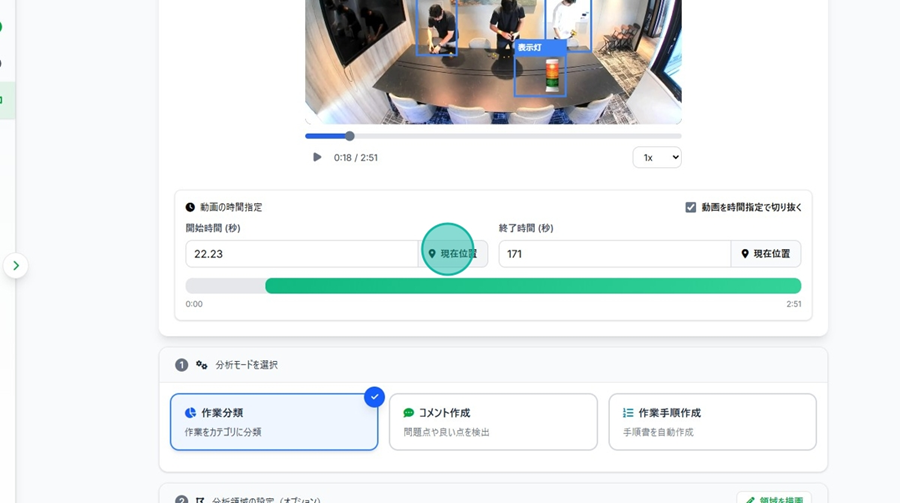
Step 4. Follow the same steps to set the end position.
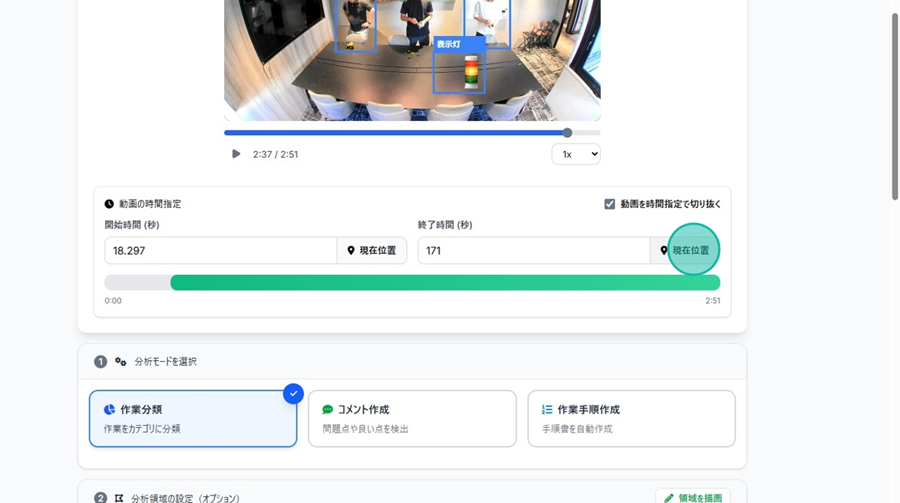
Clipping Video by Specifying Seconds
Step 2. Click the field to enter a specific number of seconds.
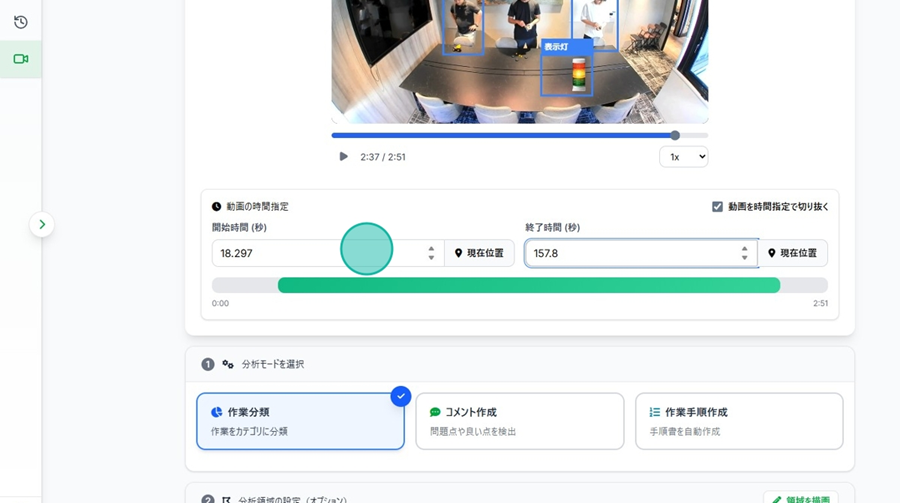
Step 3. Enter the start and end times.
Selecting Analysis Mode
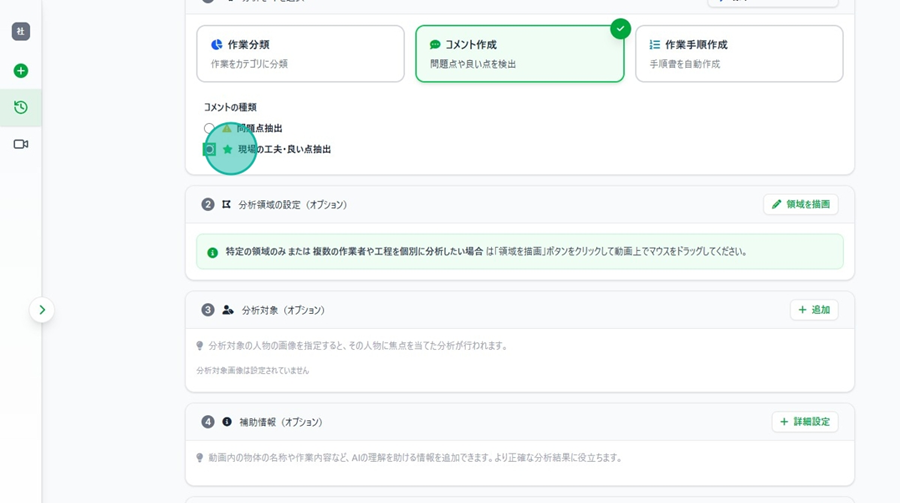
- Select "Create Comments.”
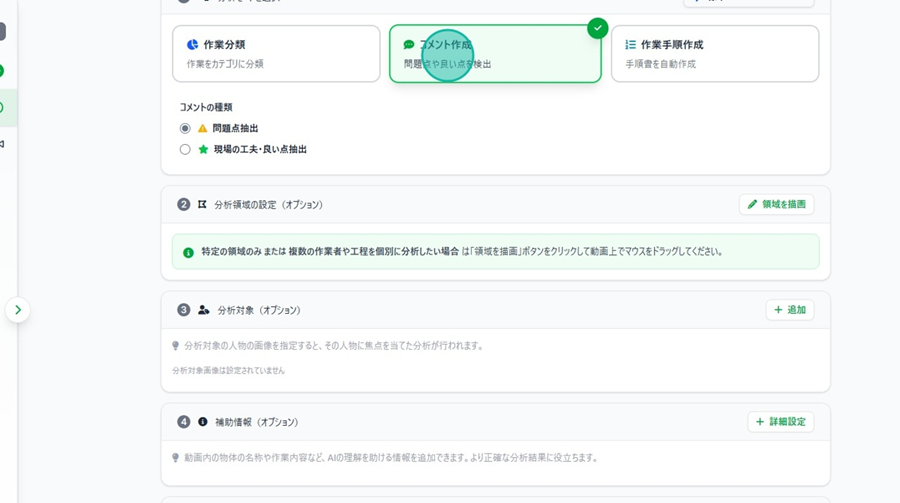
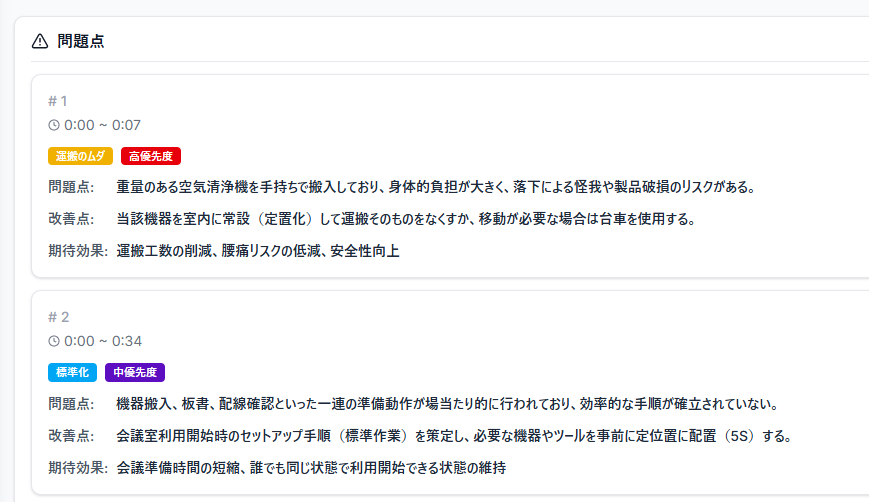
Problem Detection
👉 By default, the AI points out problems identified in the video based on IE methods.
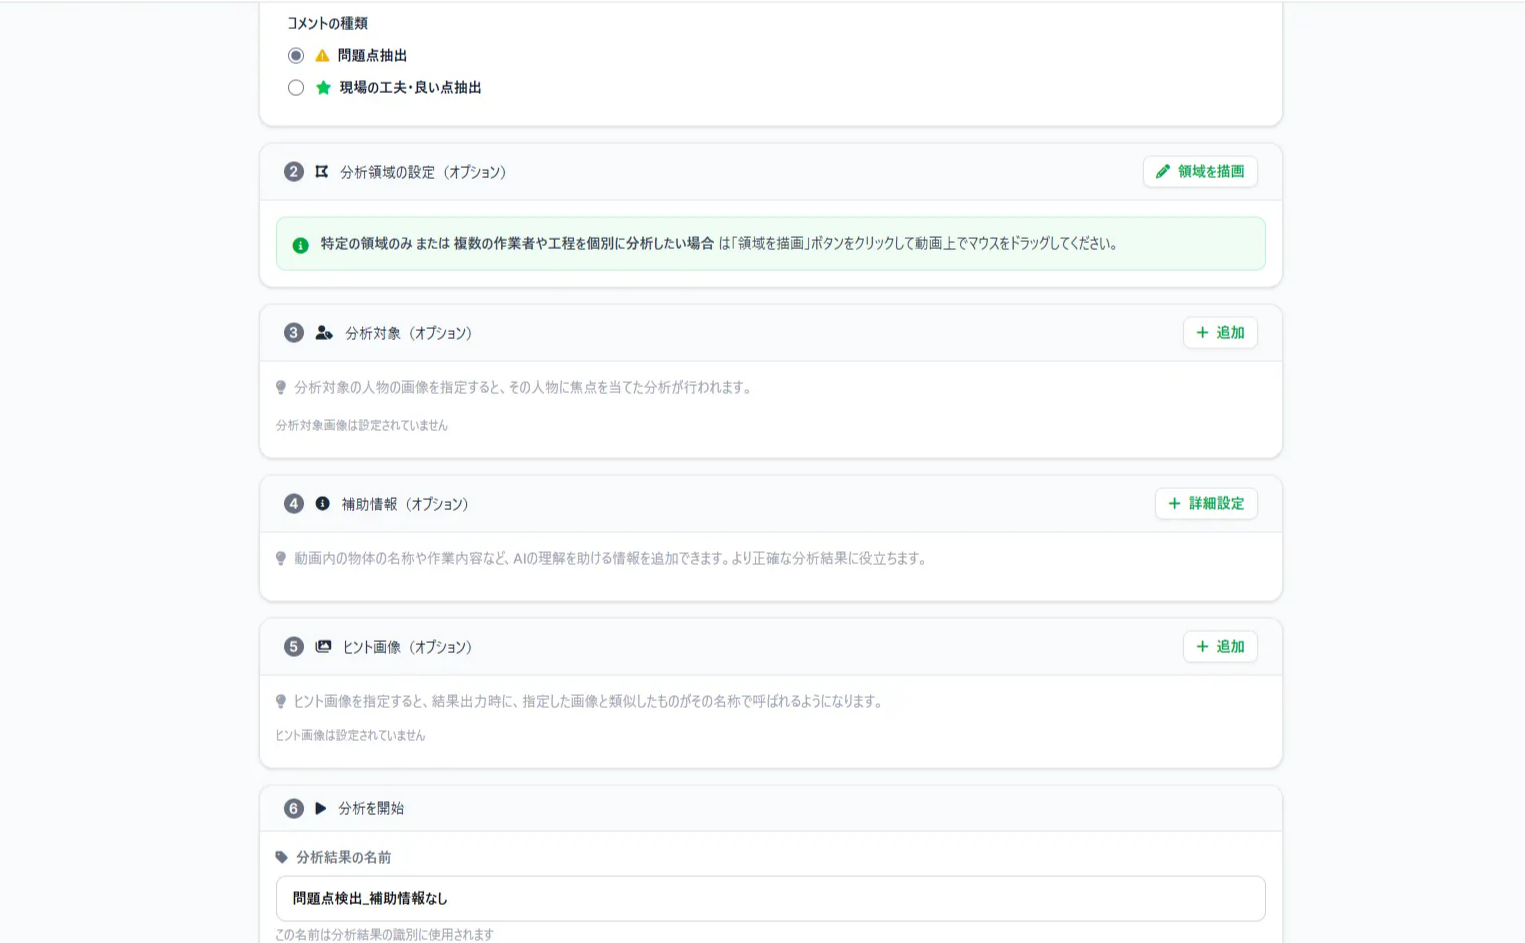
Select "Problem Detection" from the "Comment Type" menu.
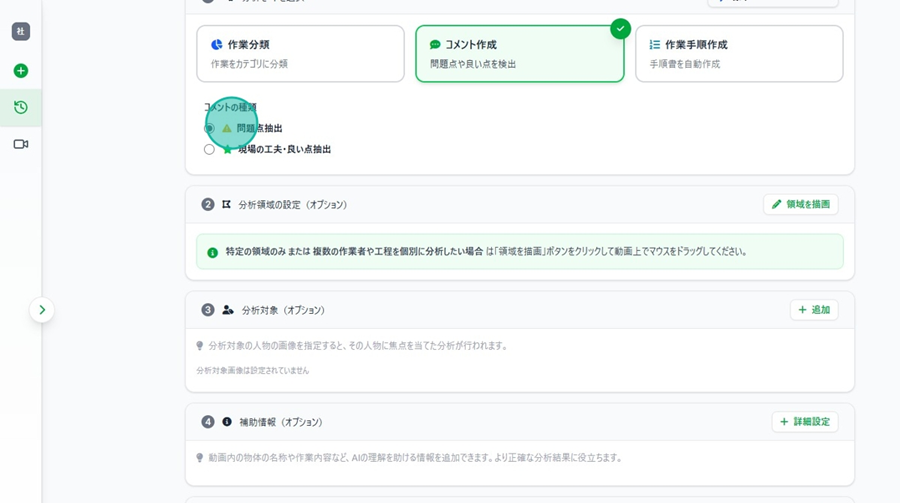
Best Practices Detection
👉 The AI identifies good practices observed in the video.
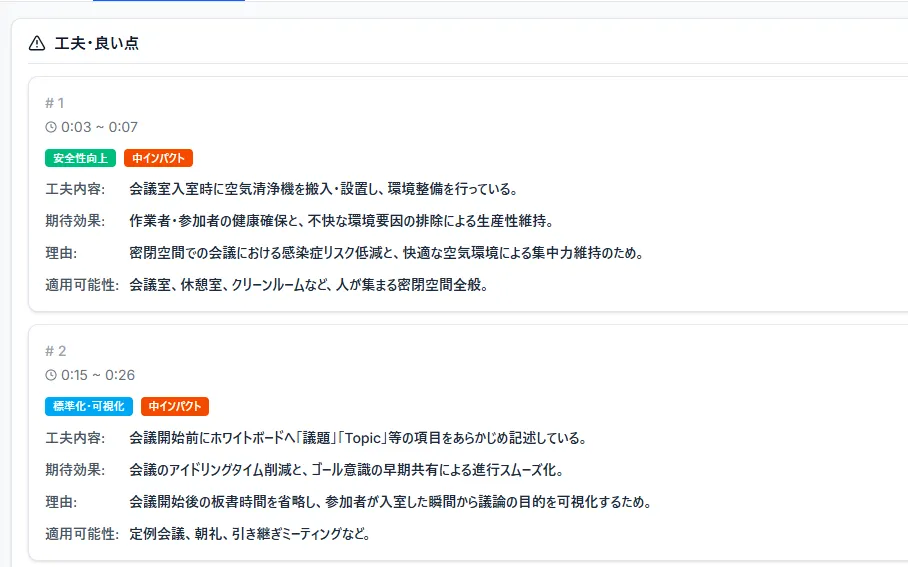
Select "Workplace Innovations / Best Practices" from the "Comment Type" menu.
Select Analysis Area (Single/Multiple Areas)
👉 Use this when you want to specify a work area or analyze multiple regions. You can assign different classifications to each area.
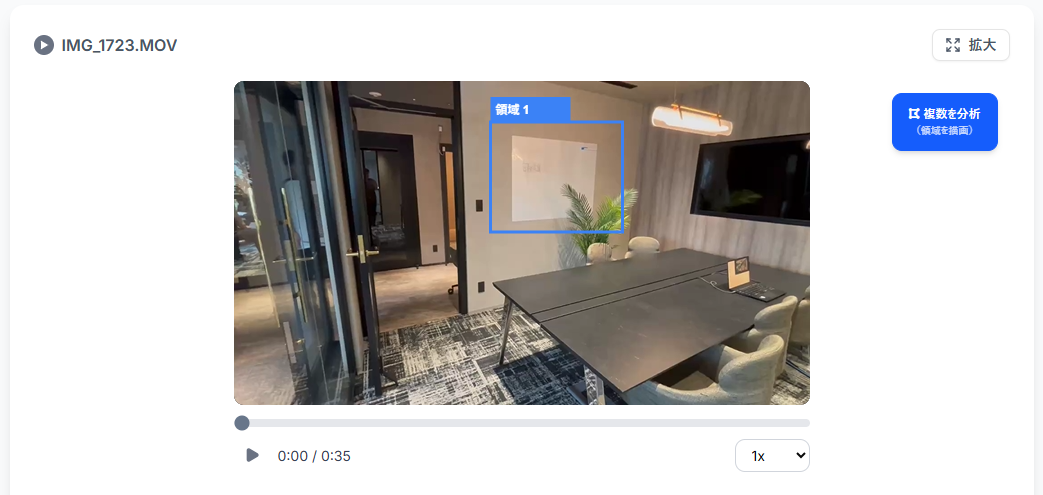
Specify Work Area (Single Area)
Step 1. Click "Draw Area”
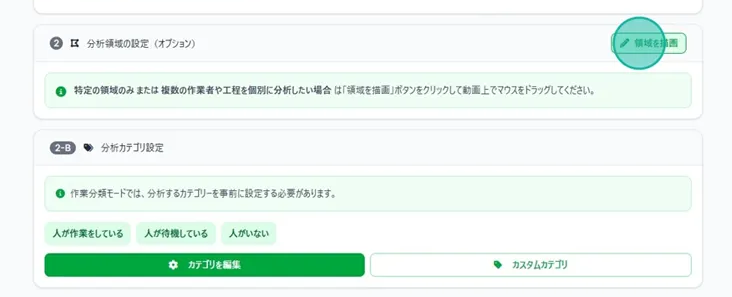
👍 You can also perform the same operation using the "Analyze Multiple" button on the right side of the video.
Step 2. Scroll up and move your mouse over the video.
Step 3. Click and drag the mouse to create a rectangular area.
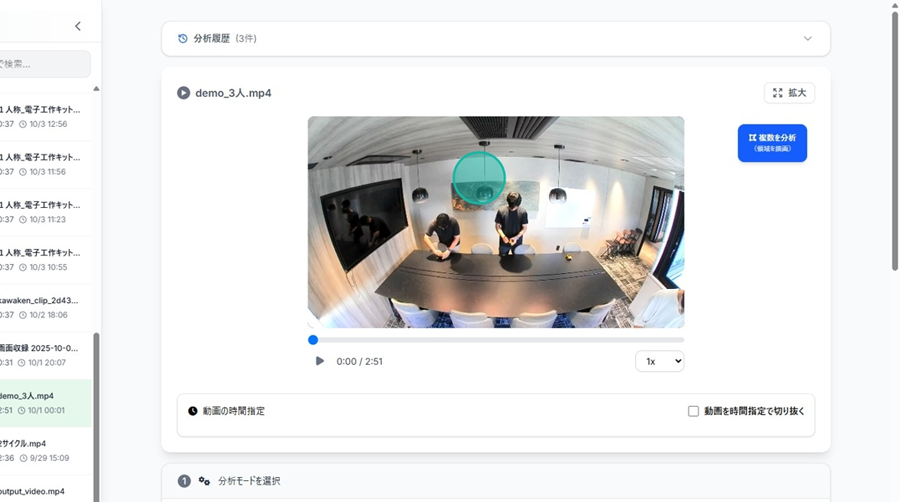
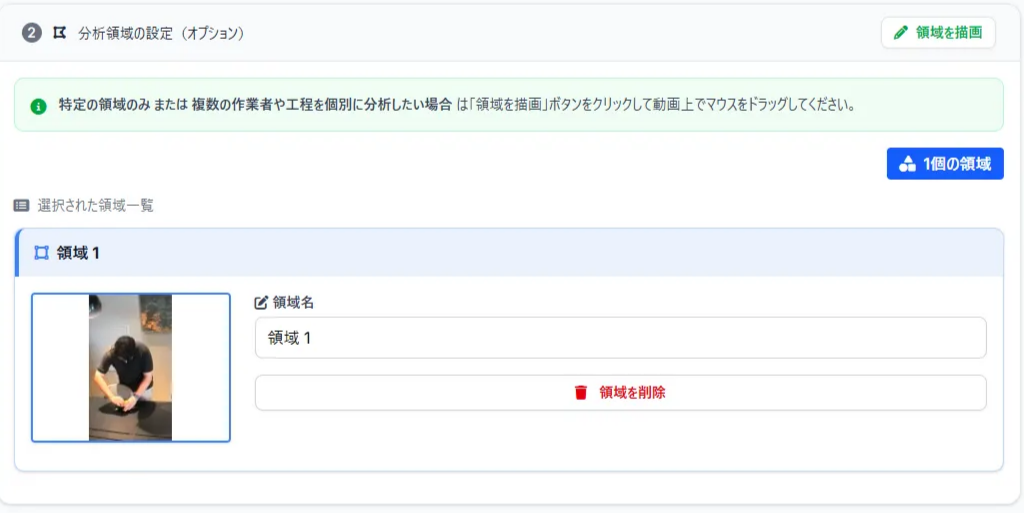
Step 4. Once selected, a capture and the settings for the specified area will appear in the "Analysis Area Settings (Optional)" section.
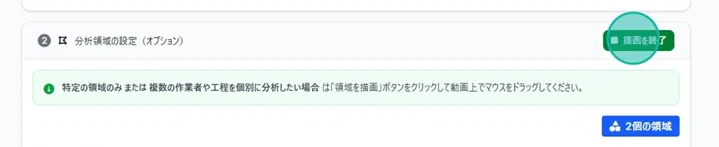
Step 5. Finish specifying the area.
Specify Work Area (Multiple Areas)
Step 1. Click "Draw Area.”
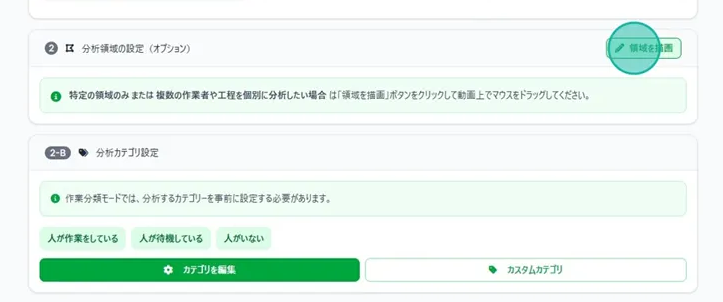
👍 The same operation can be done via the "Analyze Multiple" button on the right.
Step 2. Scroll up and move your mouse over the video.
Step 3. Click and drag to create a rectangular area.
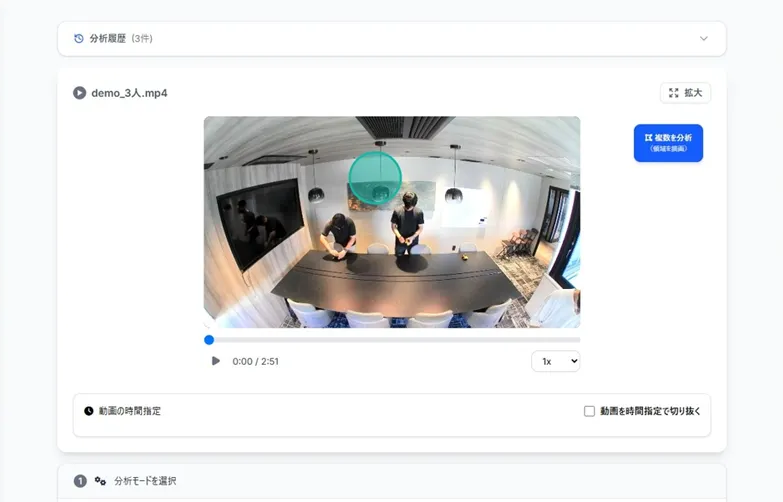
Step 4. Continue defining multiple areas in the same way.
Step 5. Once finished, captures and settings for each specified area will appear in "Analysis Area Settings (Optional).”
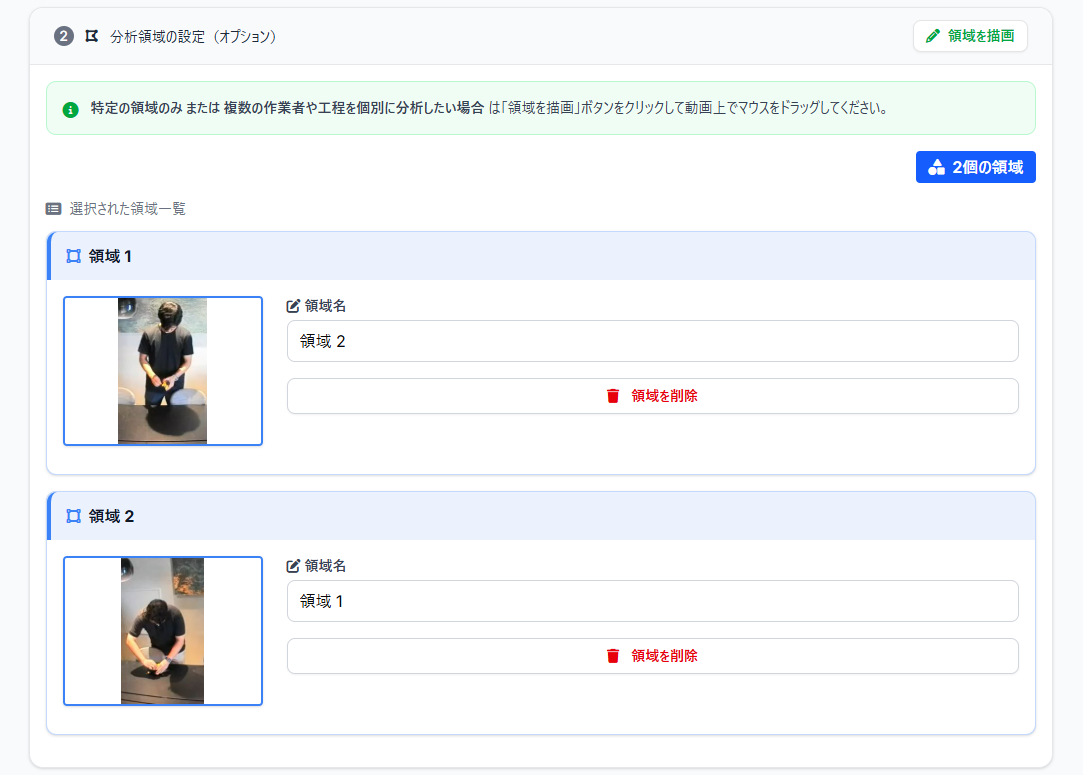
Step 6. Click "Finish Drawing" to exit the area specification.

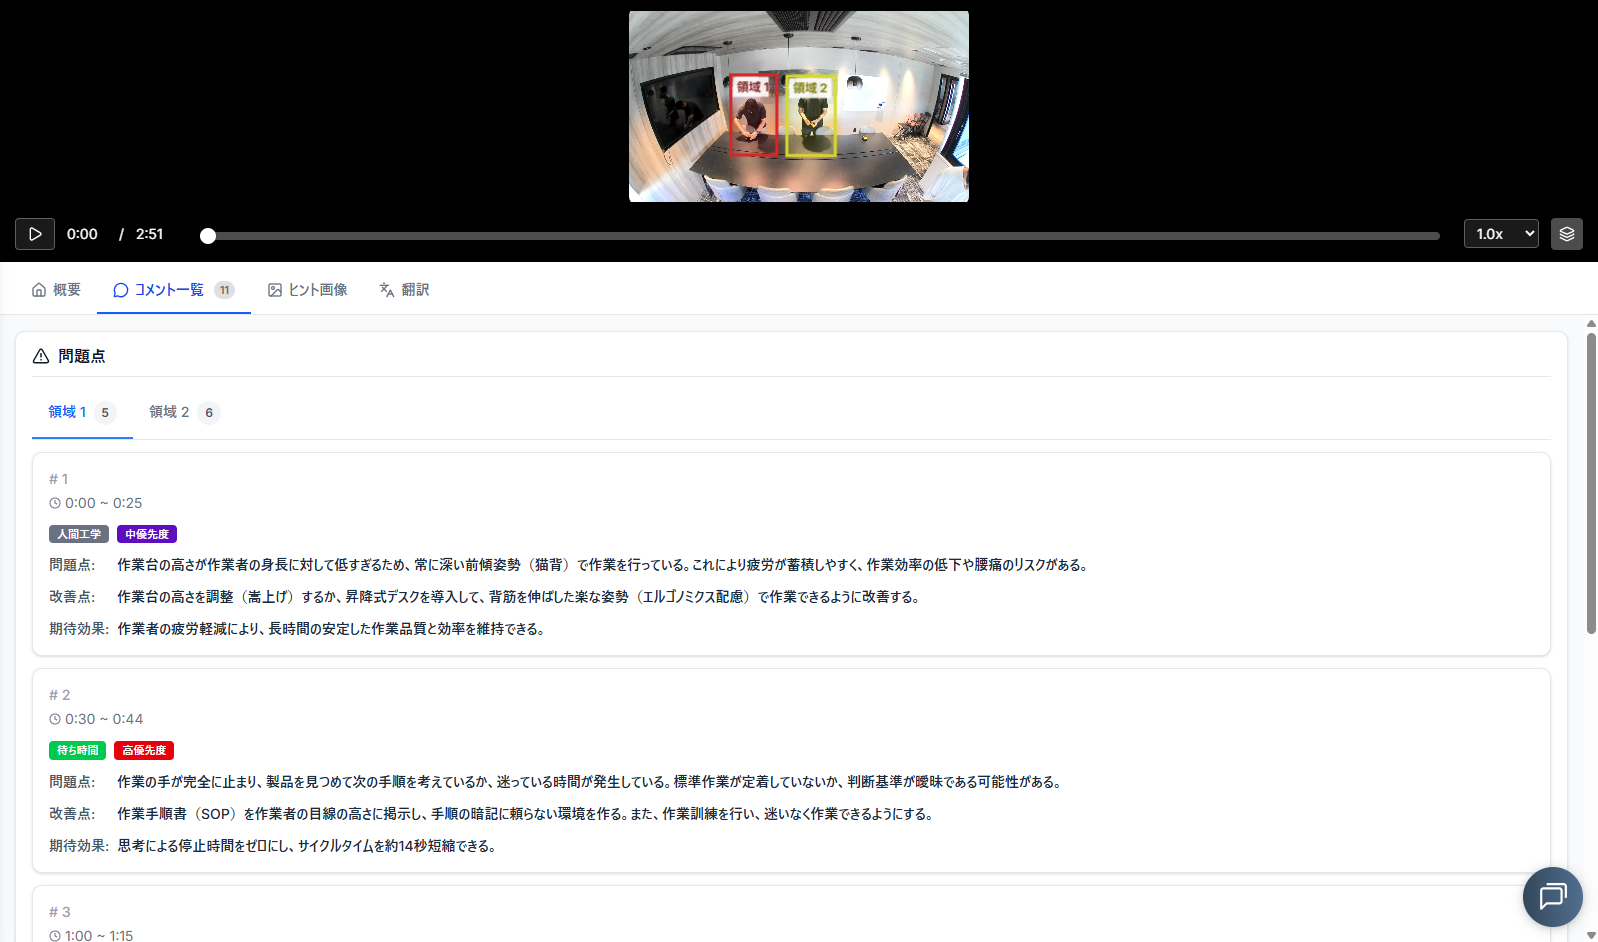
☝ The results for "Create Comments" with multiple areas will look like this.
Show Analysis Result Example
Analysis Subject Settings
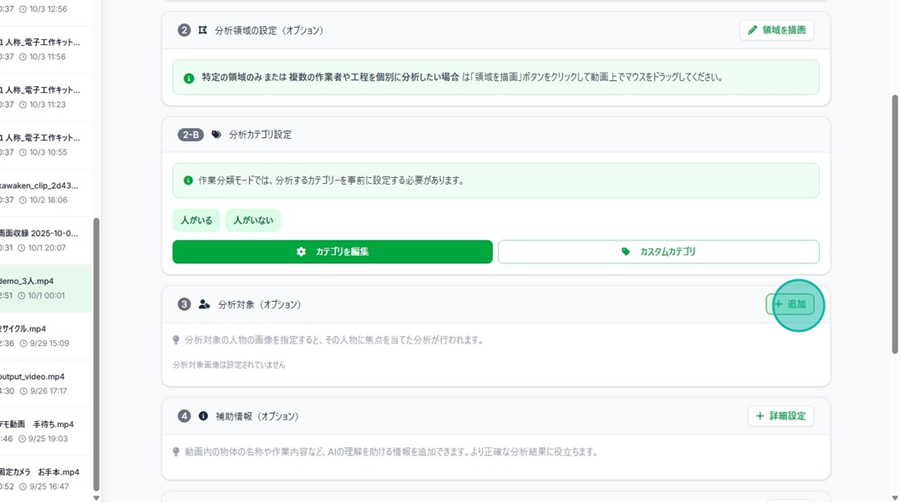
👉 By specifying an analysis subject, the analysis will focus specifically on that person.
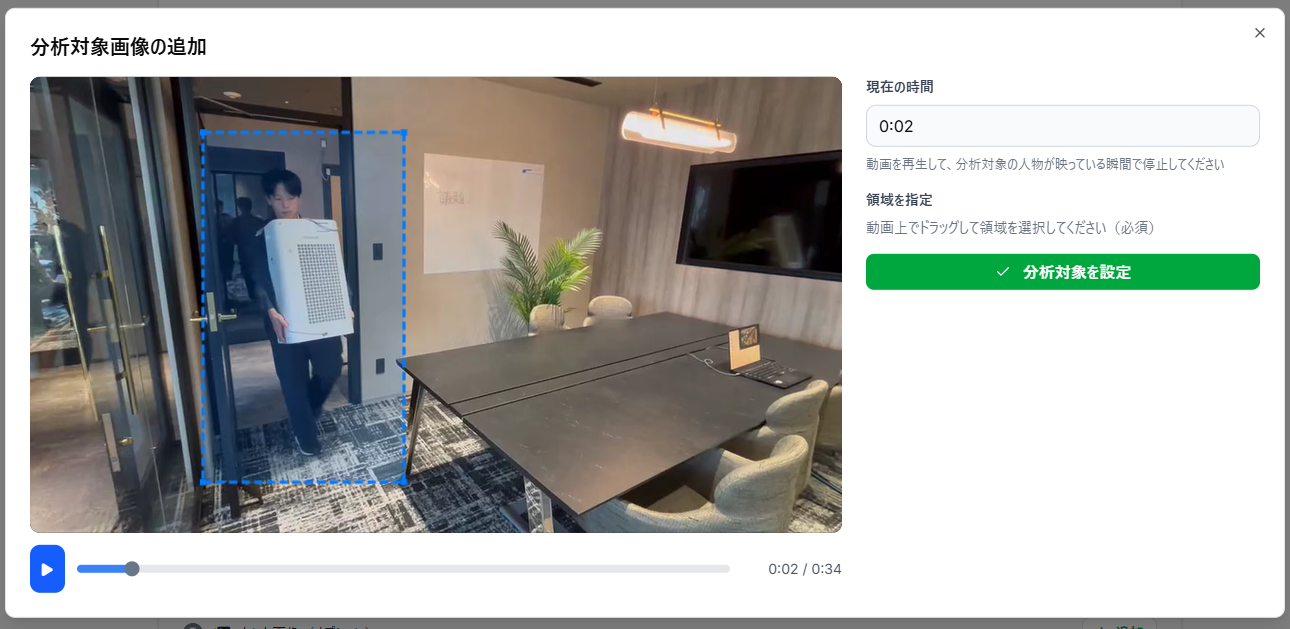
Setting the Analysis Subject
Step 1. Click "+ New" on the right side of the Analysis Subject field.
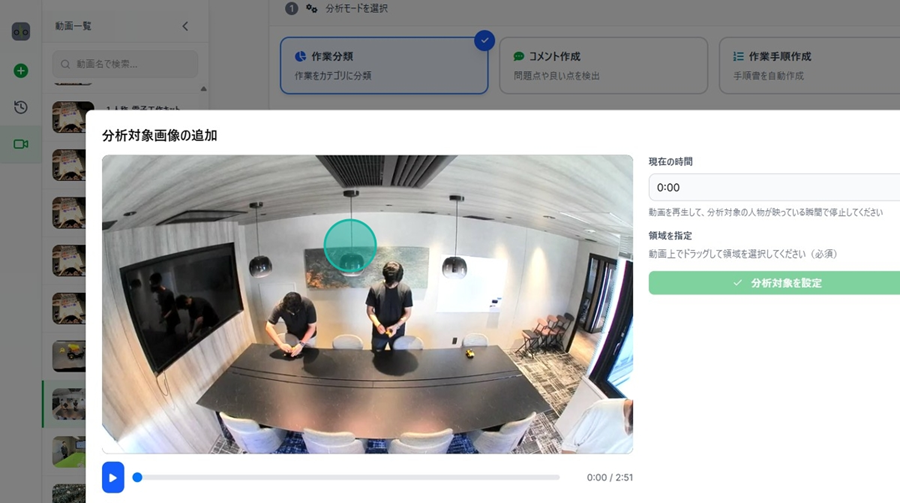
Step 2. Click and drag on the video to create a rectangular area around the subject.
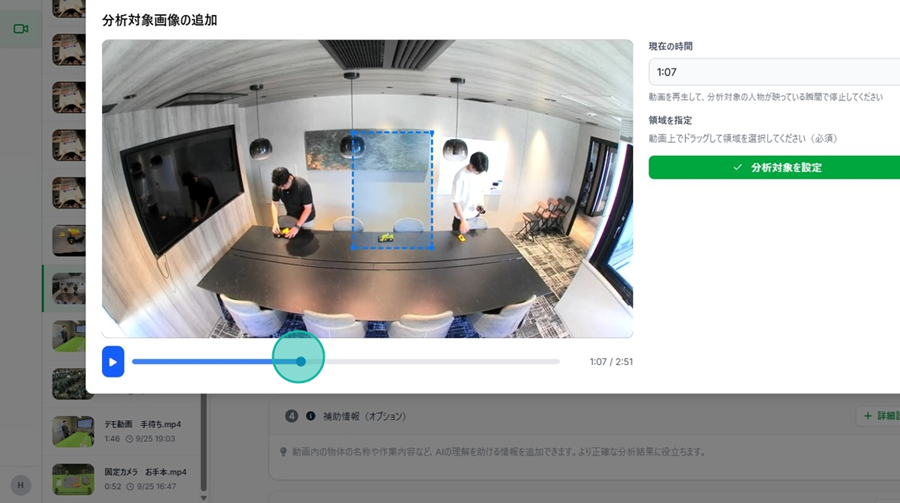
Step 3. If necessary, adjust the position by moving the playback bar.
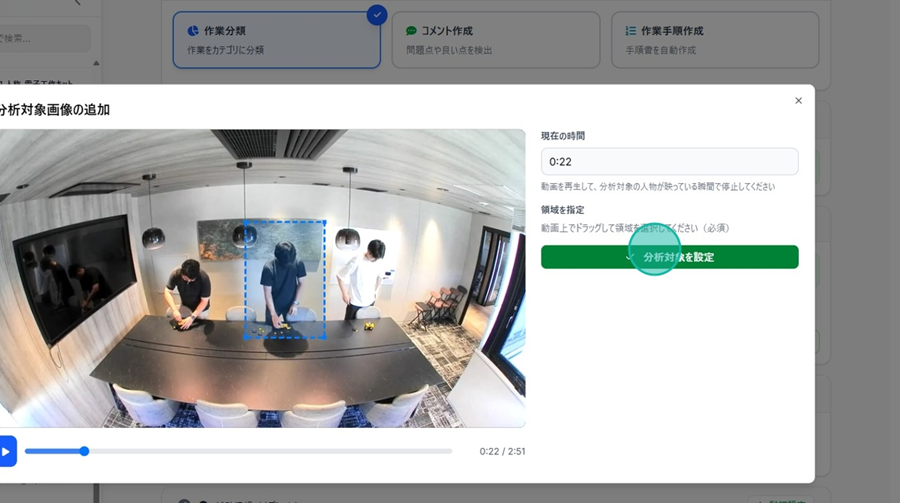
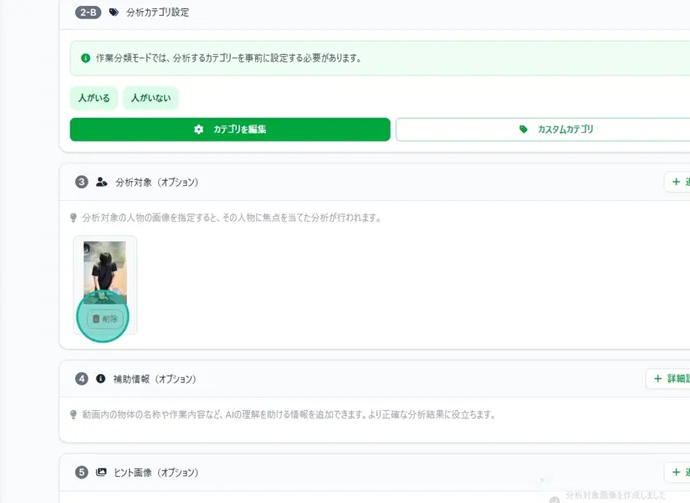
Step 4. Click "Set Analysis Subject.”
👉 You can also delete a setting by clicking "Delete.”
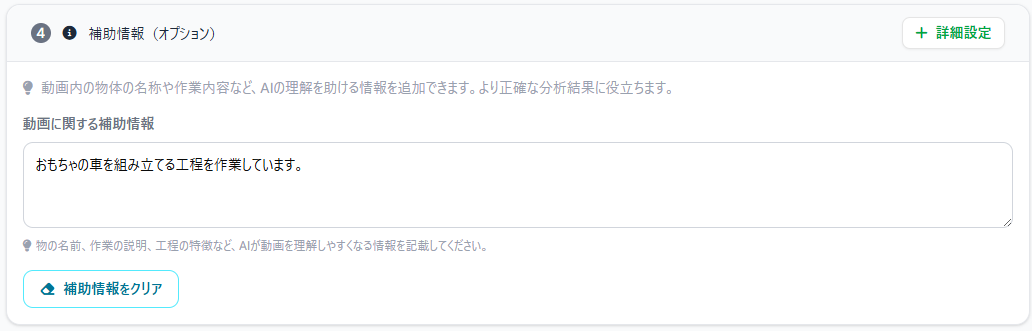
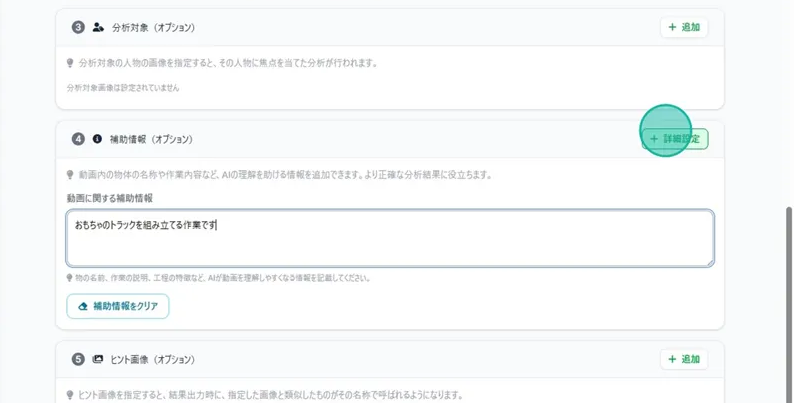
Setting Supplementary Informations
👉 You can freely add information to help the AI understand the video, such as object names or task details. This helps improve analysis accuracy.
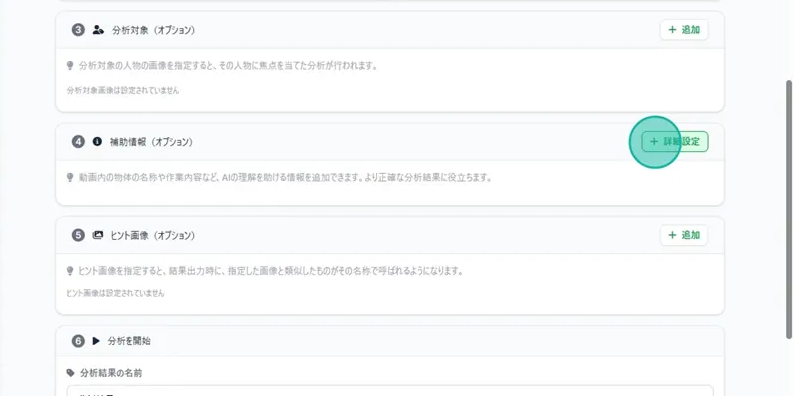
Setting Procedure
Step 1. Click "+ Advanced Settings" on the right side of the Supplementary Information field.
Step 2. Click the "Supplementary Information about Video" field and enter the details.
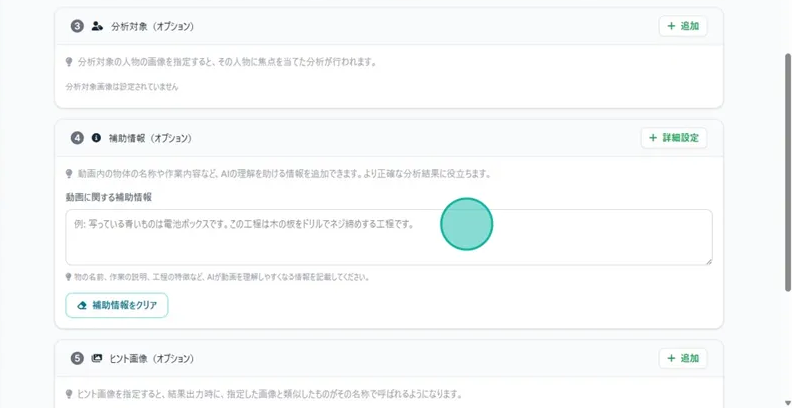
Step 3. Click "Advanced Settings" to finish editing.
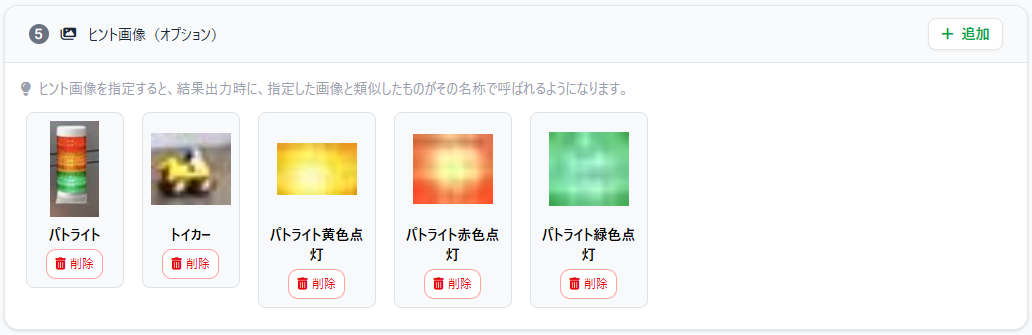
Setting Hint Images
👉 By specifying hint images, the AI will label similar objects found during analysis with the name you provided.
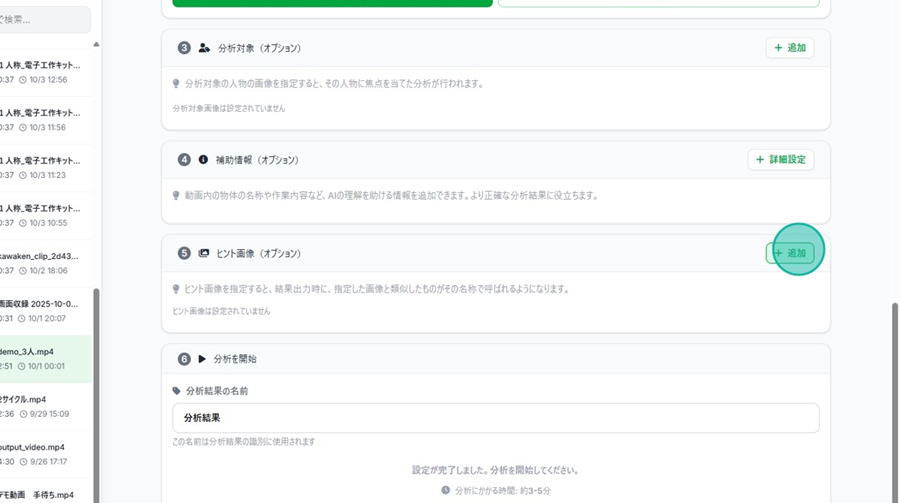
How to Set
Step 1. Click "+ New" on the right side of the Hint Image field.
Step 2. Click and drag on the video to create a rectangular area. You can also adjust this by moving the playback bar.
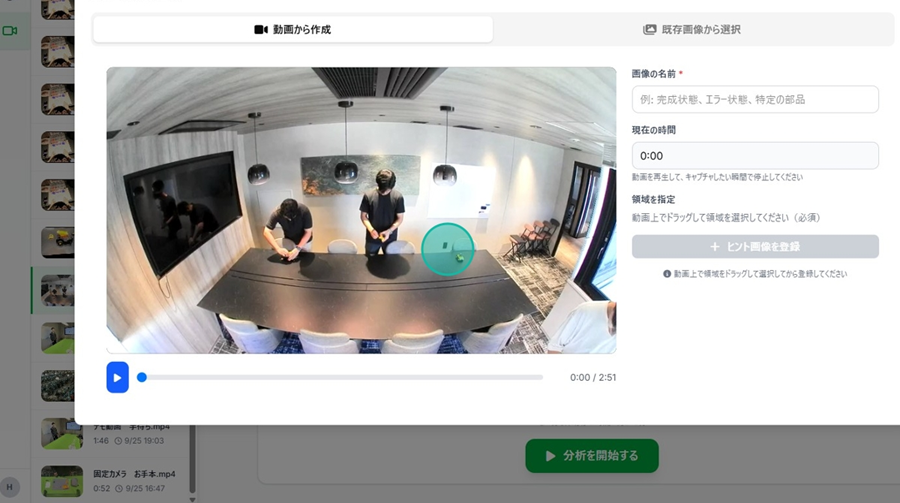
Step 3. Edit the name of the image.
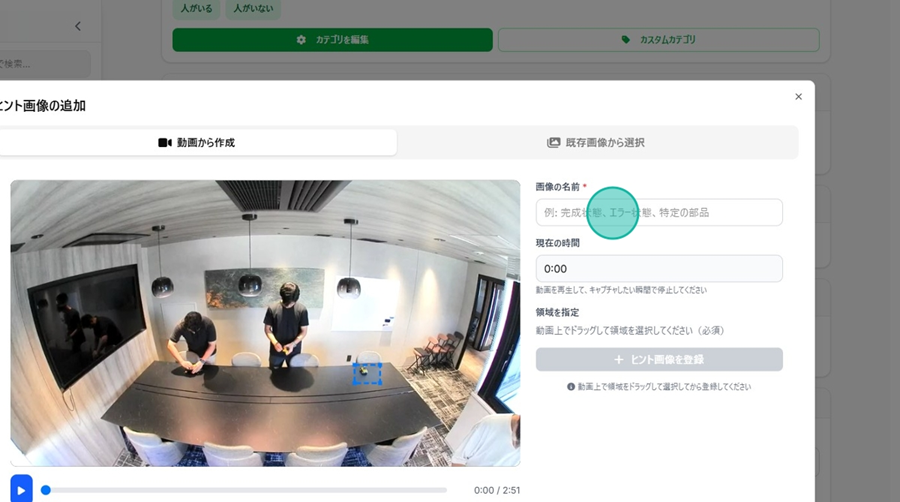
Step 4. Click "Register Hint Image.”
☝ You can register multiple images in succession.
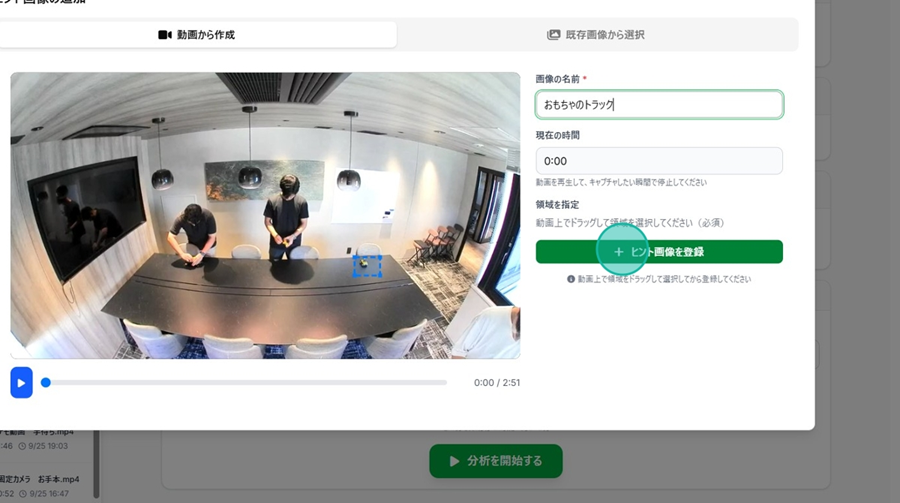
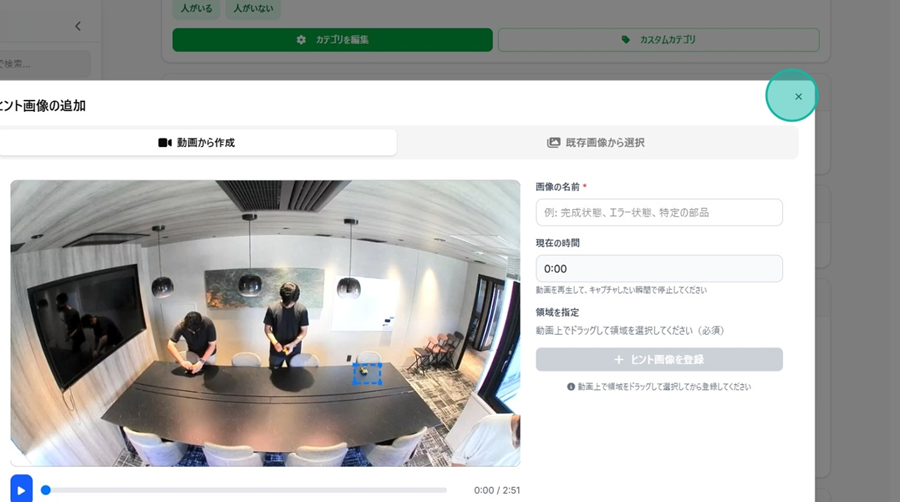
Step 5. Press the "×" button to finish registration.
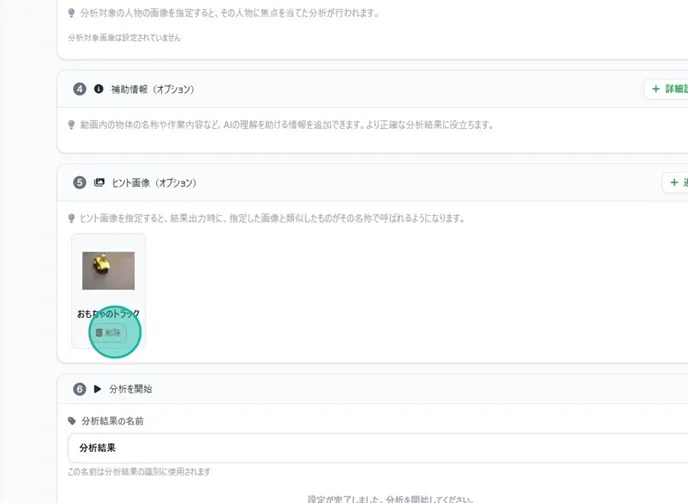
👉 You can also delete an image by clicking "Delete.”
Set Analysis Result Name
👉 You can name your analysis results.
How to Set
Click the "Analysis Result Name" field in the "Start Analysis" section and edit the name.
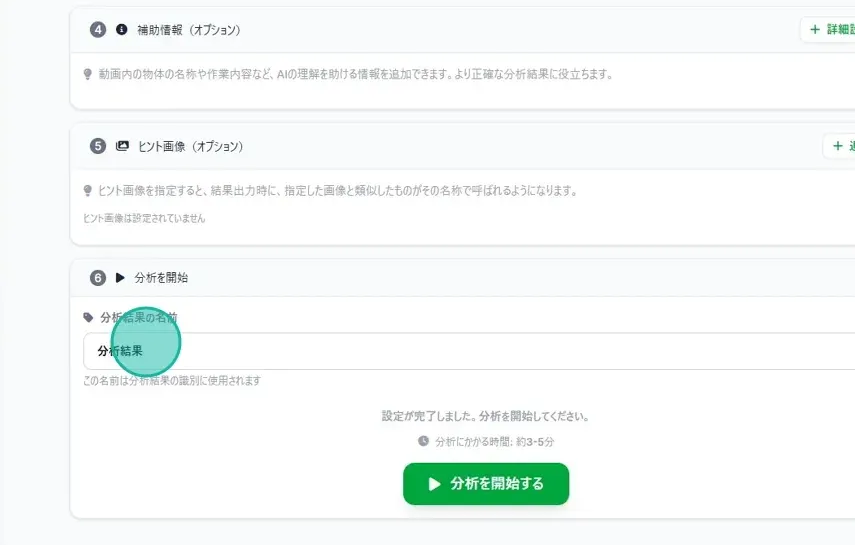
☝ The name registered here will be used in the “Comparison List.”
Checking Previous Analysis
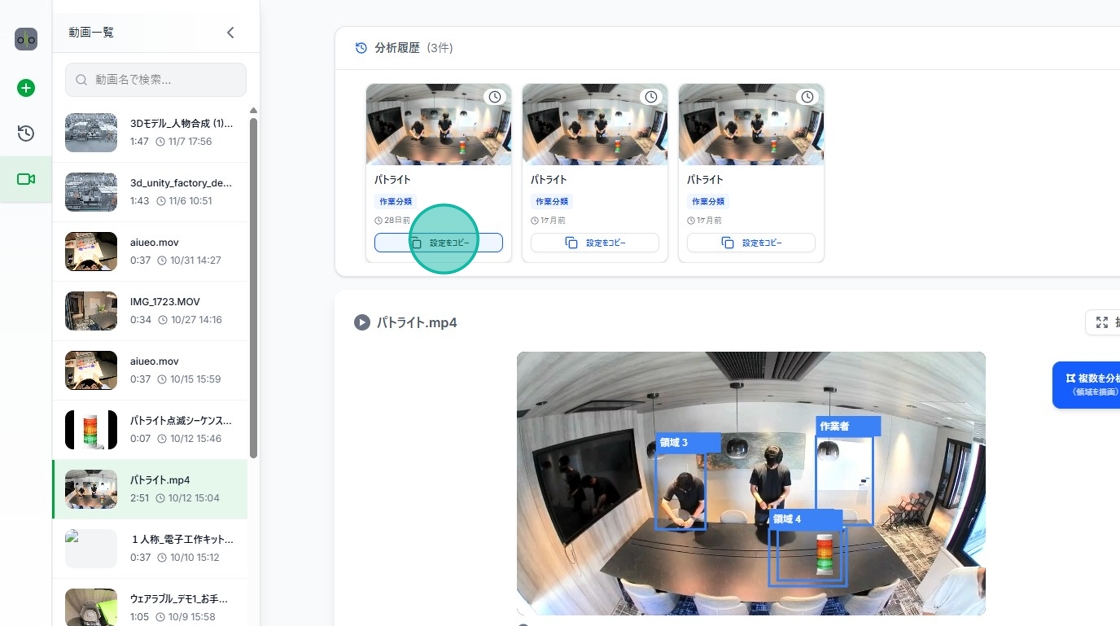
👉 You can check previous analyses generated from the video or copy settings from them.

Step 1. Scroll up and click "Analysis History.”
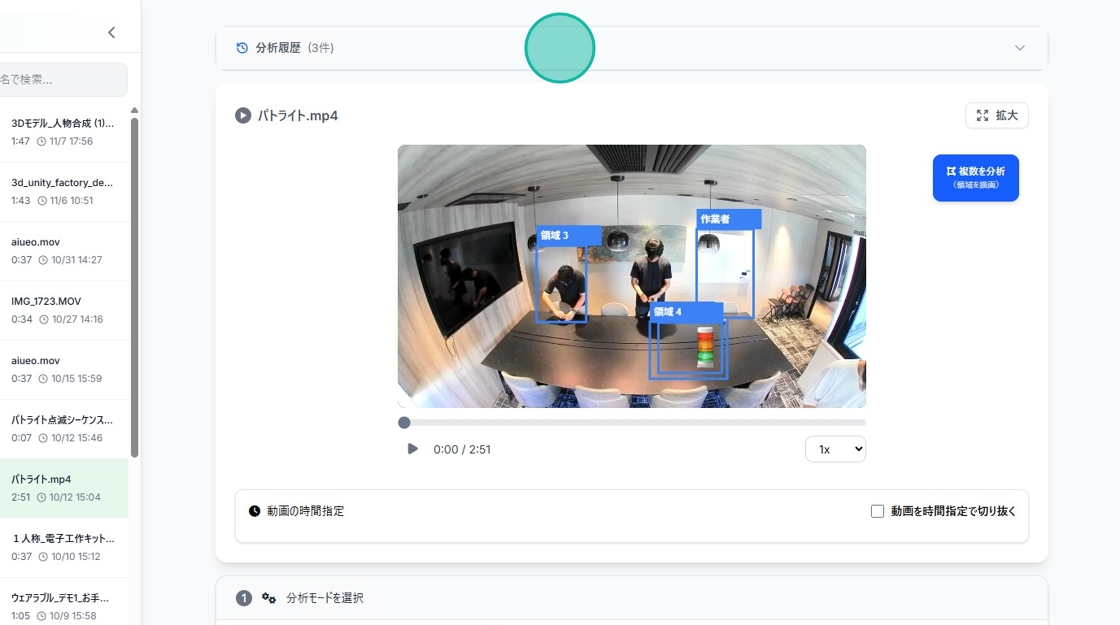
Step 2. Click "Copy Settings" to reuse the settings used in that specific analysis.