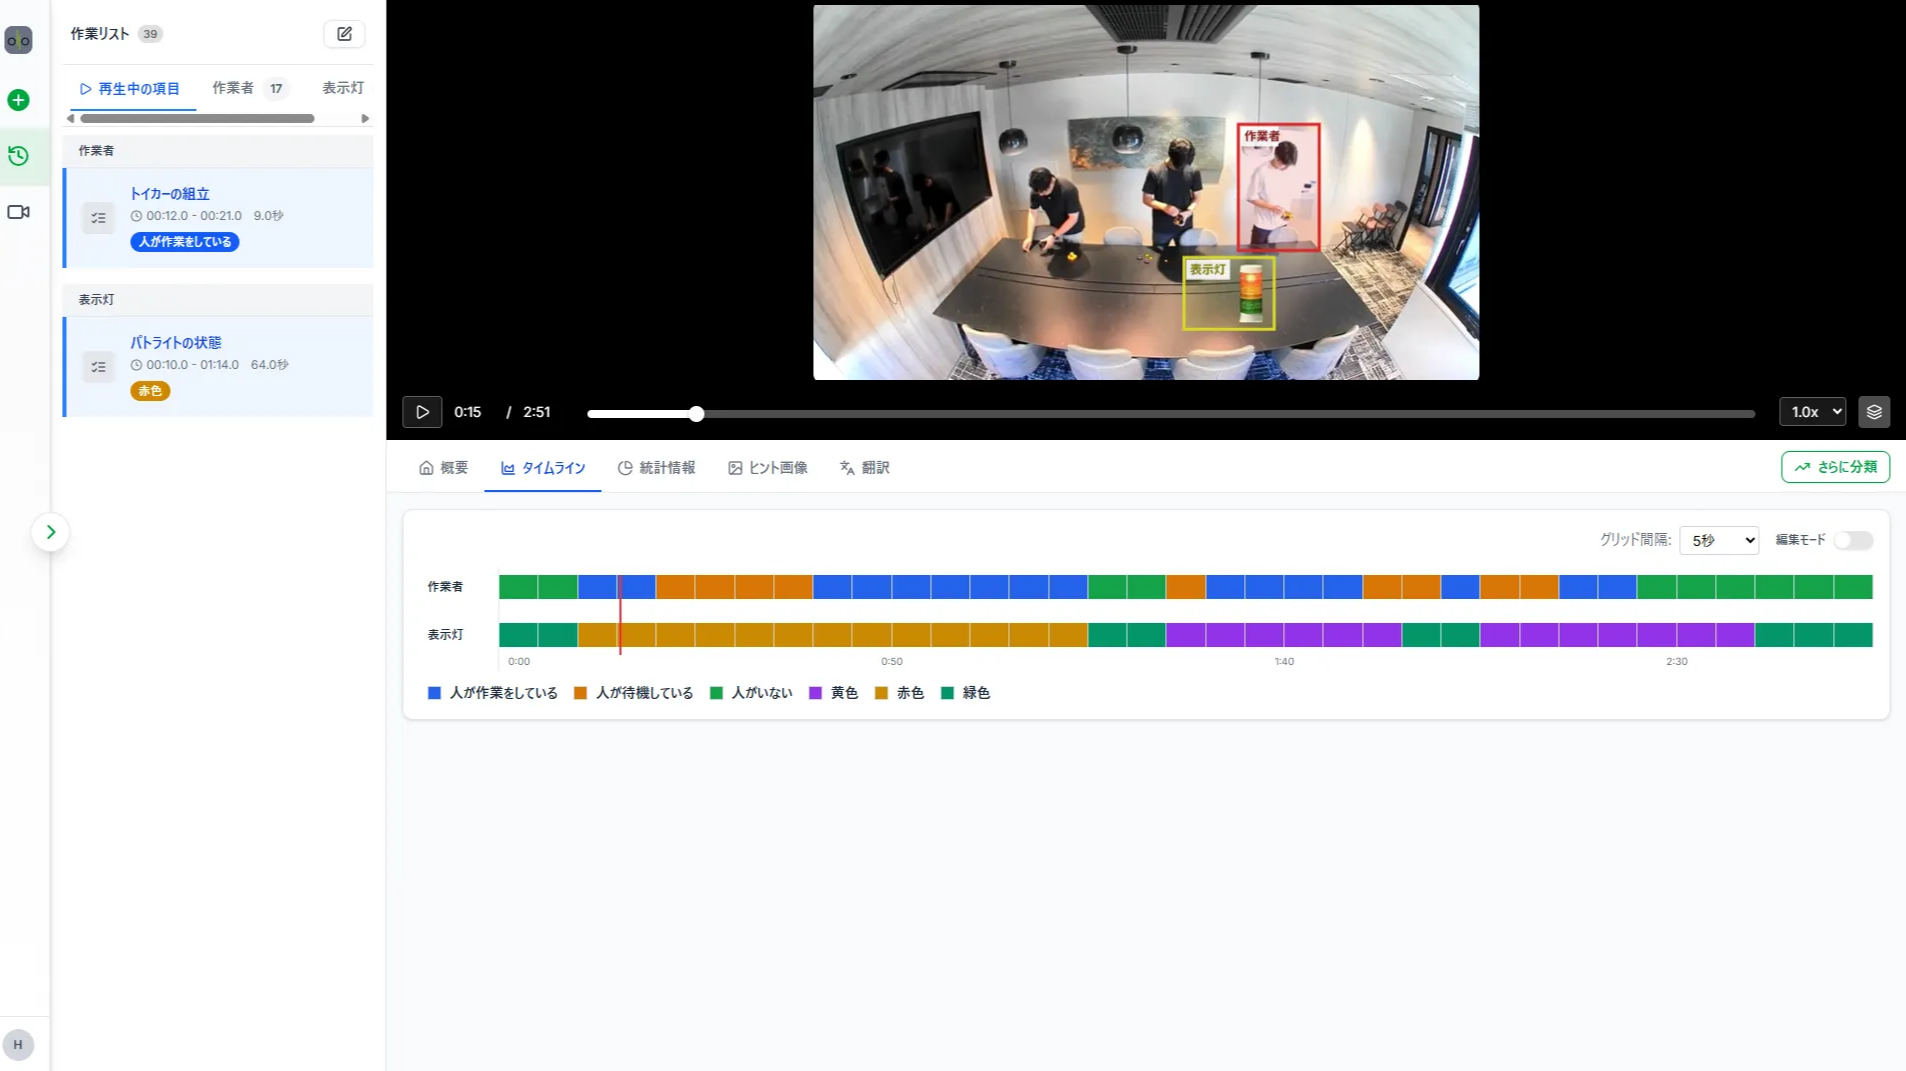
👉 You can specify how the work should be categorized.
- Input Example:
Operator: "No one present," "Person working," "Person waiting" (Set using Predefined Categories).
Signal Light: "Yellow," "Red," "Green" (Set using Custom Categories).
- Output Example:
What is a Category Set?
❓ A Category Set is a feature that groups multiple classification categories by type. Creating a Custom Category Set saves time by allowing you to select a group of categories at once.
Using Predefined Categories
👉 Use ready-made categories. You can select categories across different Category Sets.
Show Setup Steps
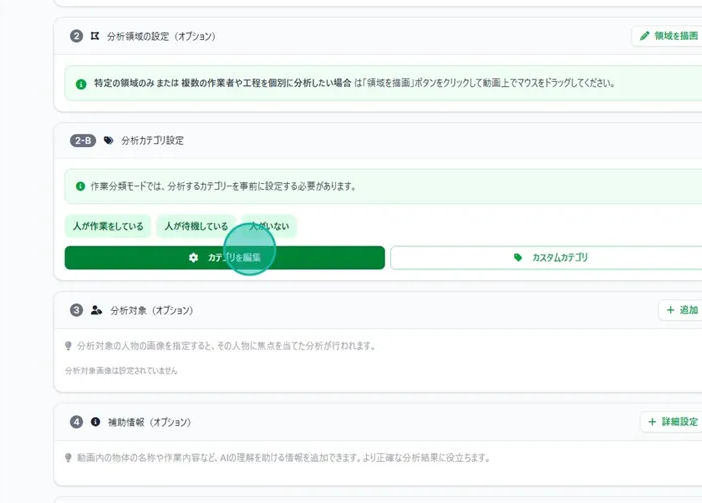
Step 1. Click "Edit Categories" in the "Analysis Category Settings" section.
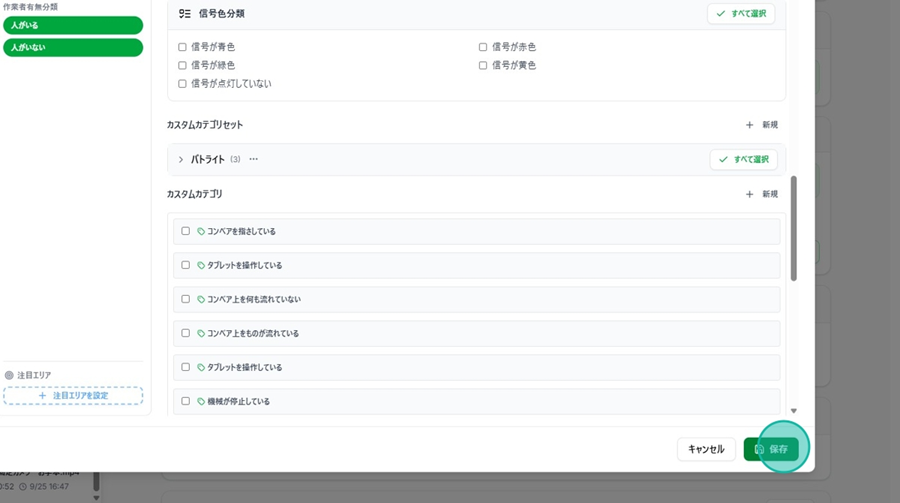
Step 2. Click to select the classification items you want to include in the analysis output.
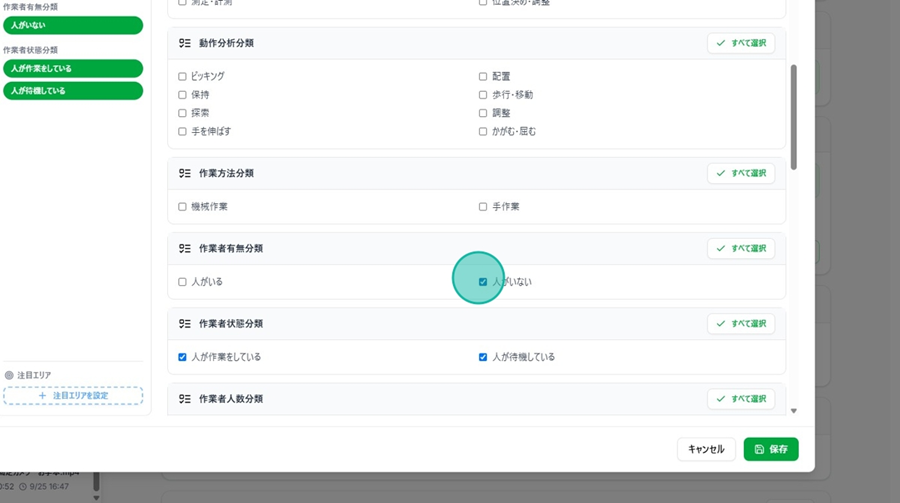
👉 You can click "Select All" to select all categories within a Category Set at once.
Step 3. Click "Save" at the bottom right to complete your selection.
Using Custom Categories
👉 You can analyze the work by using categories you defined yourself. Definitions can be made using text or images, and it is possible to select categories across both "Predefined Category Sets" and "Show Setup Procedures”
Showing Setup Procedures
Registering Custom Categories (Text-based)
Step 1. Click "Edit Category" in the "Analysis Category Settings" column.
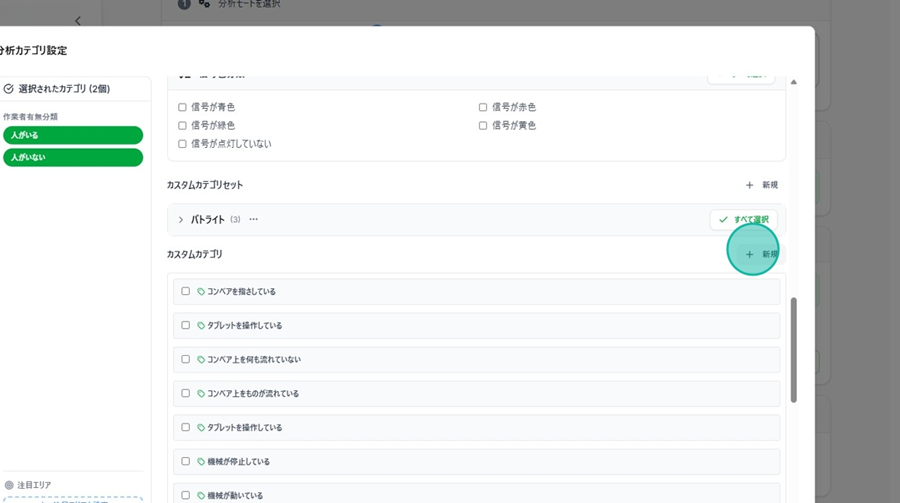
Step 2. Scroll down and click "+ New" in the upper right of the "Custom Category" column.
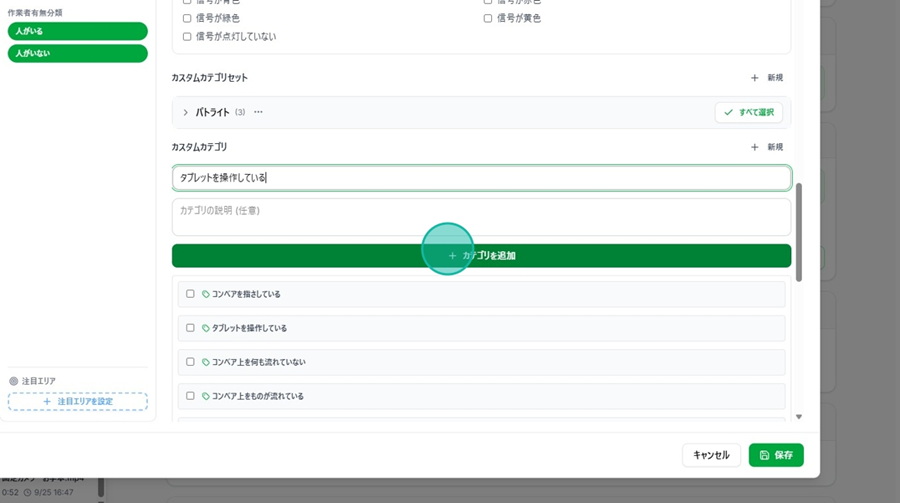
Step 3. Set the name and description for your custom category, then click "+ Add Category."
👉 Providing a description helps the AI understand the context for more customized analysis.
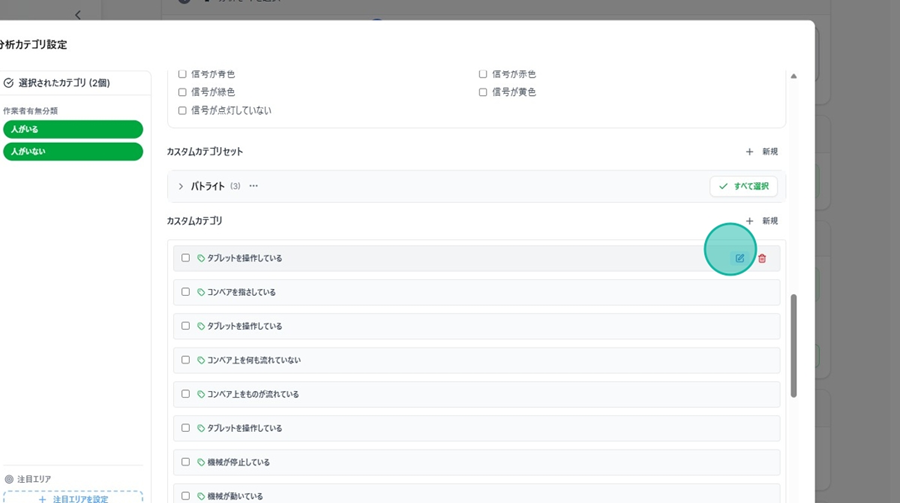
👉 You can modify or delete categories at any time using the edit button on the right.
Step 4. Click "Save" in the bottom right to complete the selection.
Registering "Custom Categories" (Image-based)
Step 1. Select the desired region and proceed with the following steps.
Step 5. Edit the Region Name and Analysis Category based on your desired output.
Step 2. Click "Custom Category" within the selected region.
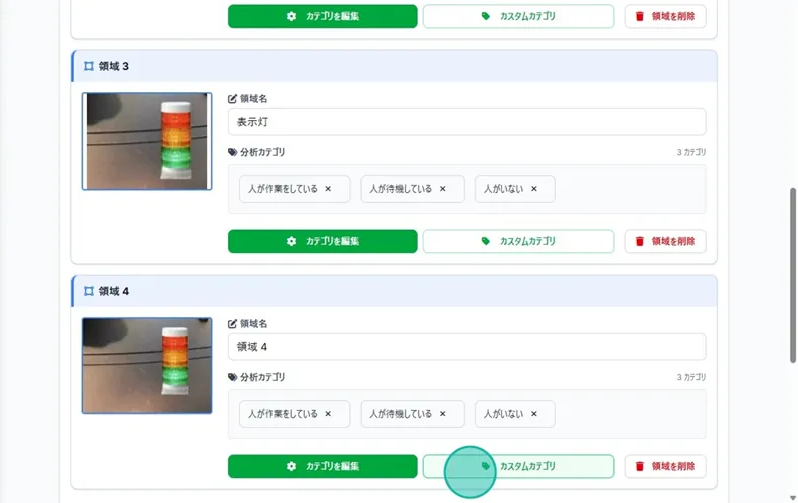
Step 3. Click "+ New."
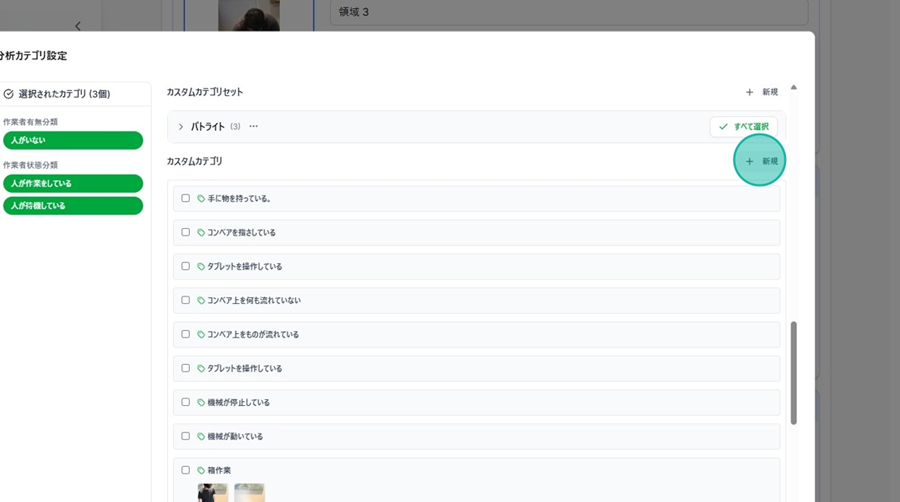
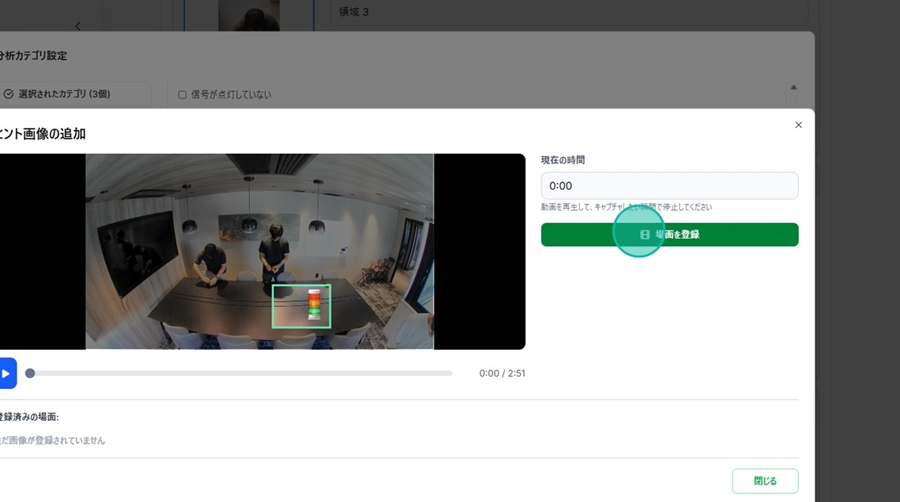
Step 4. Click "Set Video Scene."
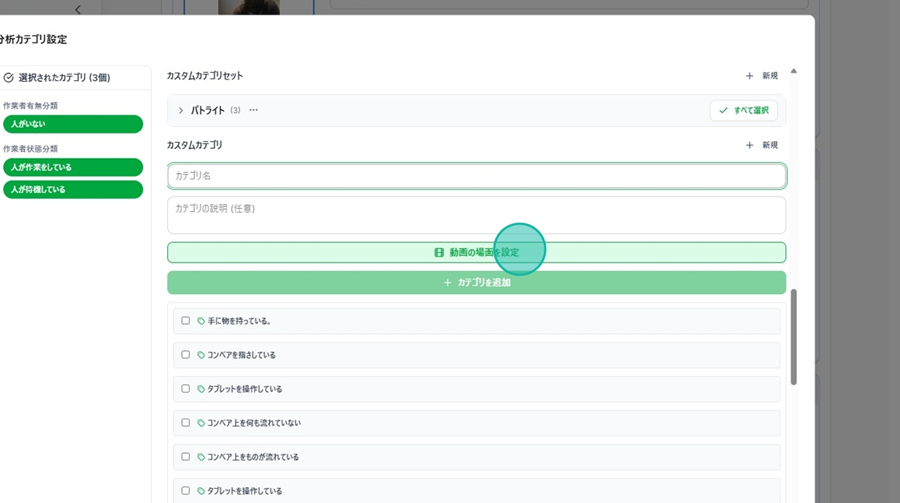
Step 5. Move the playback bar to the specific frame you wish to register.
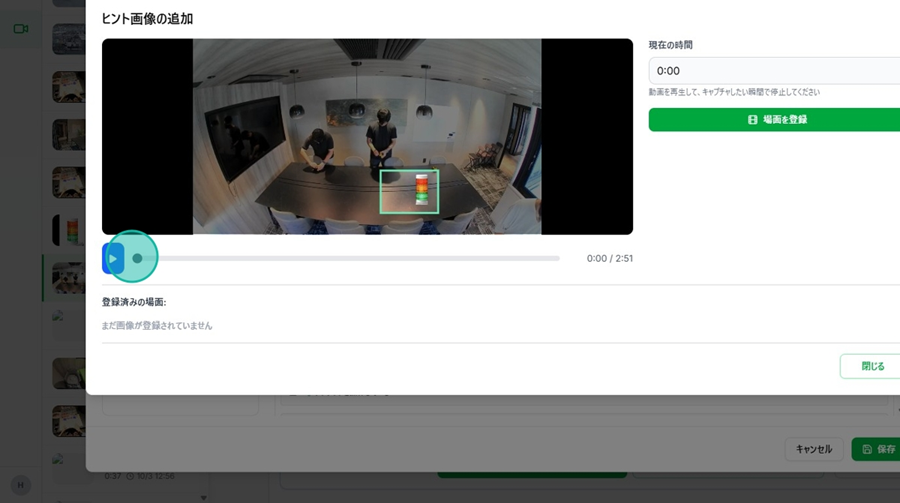
Step 6. Click "Register Scene."
Step 7. Click "Close" to exit the region settings.
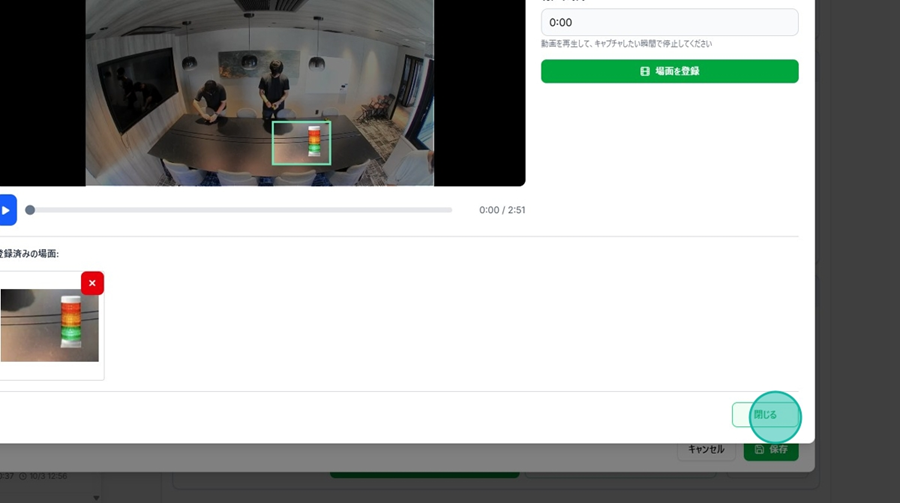
Step 8. Add a name and description, then save your changes.
☝ For details, please refer to:
Step 3. Set the name and description for your custom category, then click "+ Add Category."
Registering Custom Category Sets
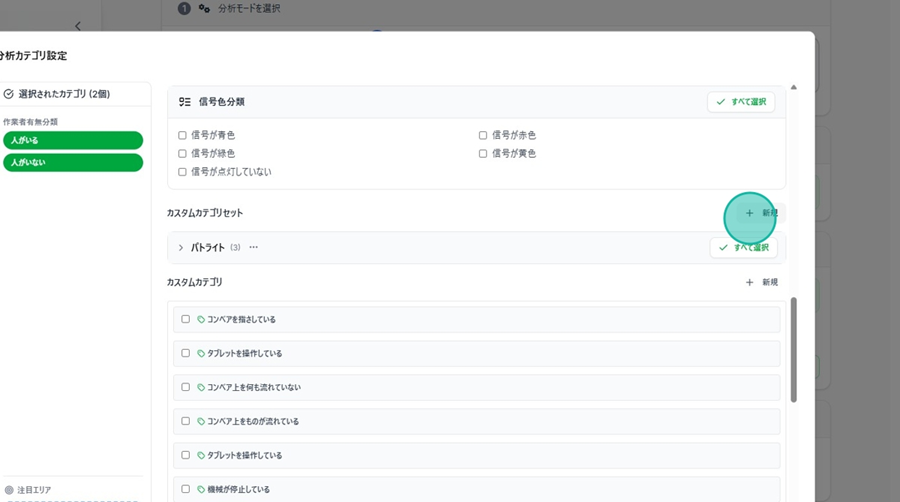
Step 1. Click "+ New" on the right side of "Custom Category Set."
Step 2. Select the categories you want to group together (multiple selections are allowed).
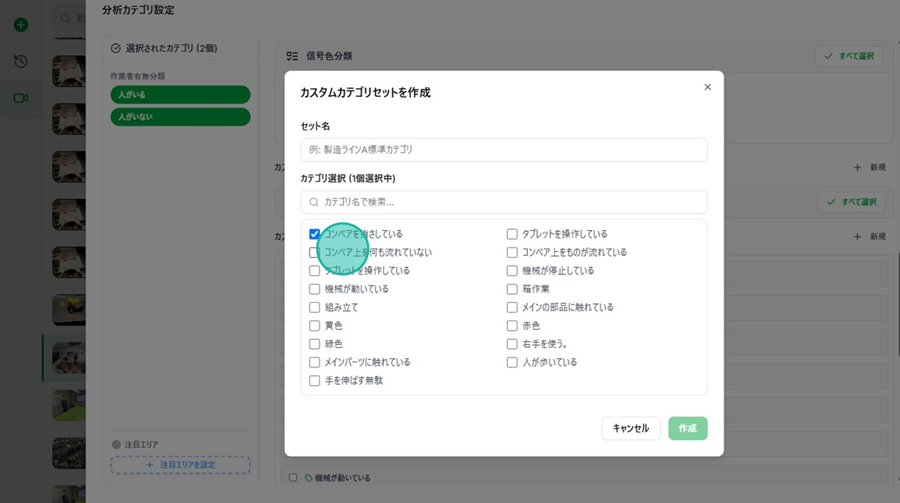
Step 3. Enter a name for the set.
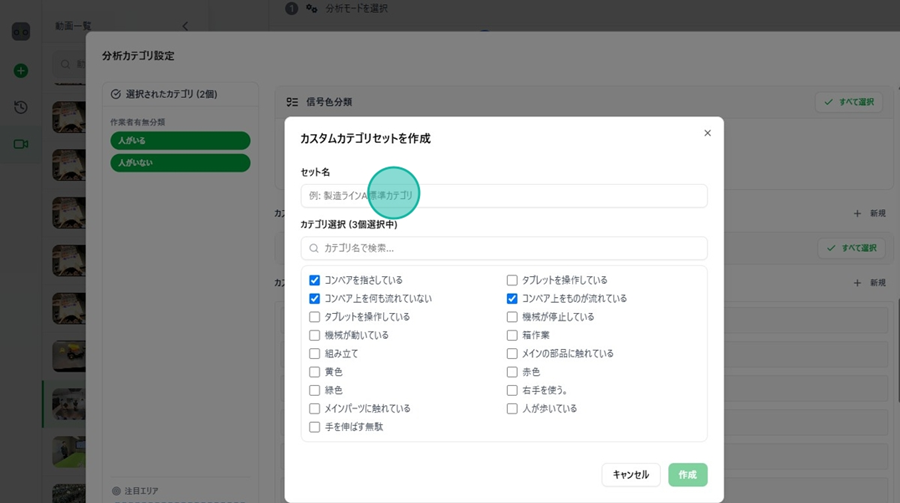
Step 4. Click "Create" to finish.
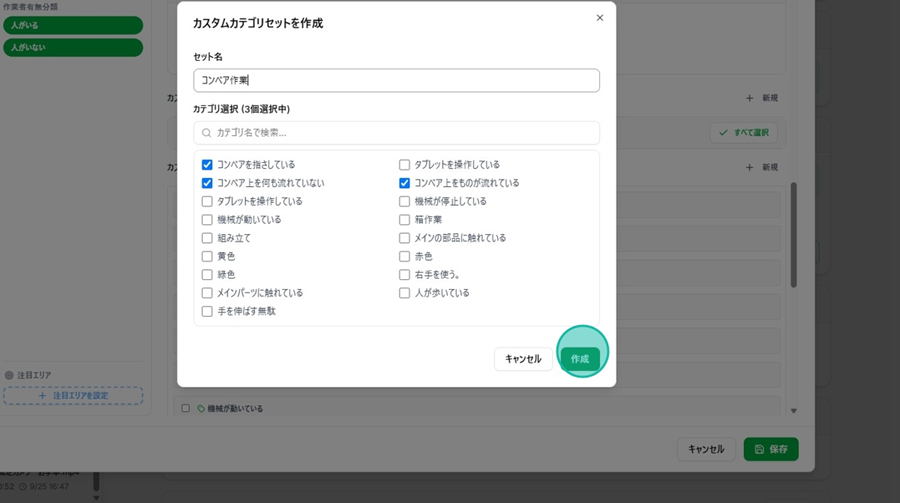
👉 Once registered, you will be able to use the custom category set in your analysis.
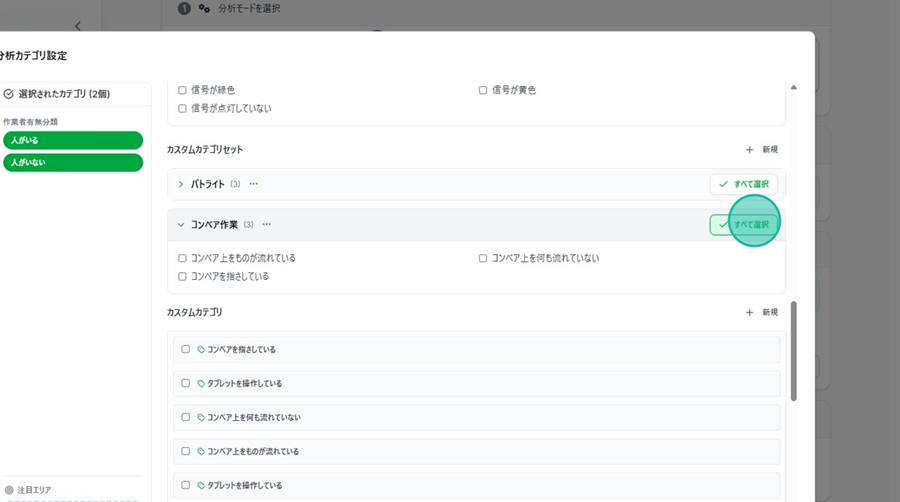
👉 You can edit or delete sets at any time via the three-dot icon to the right of the category name.
Creating Sub-Categories
👉 You can create deeper levels of classification within an existing analysis category.
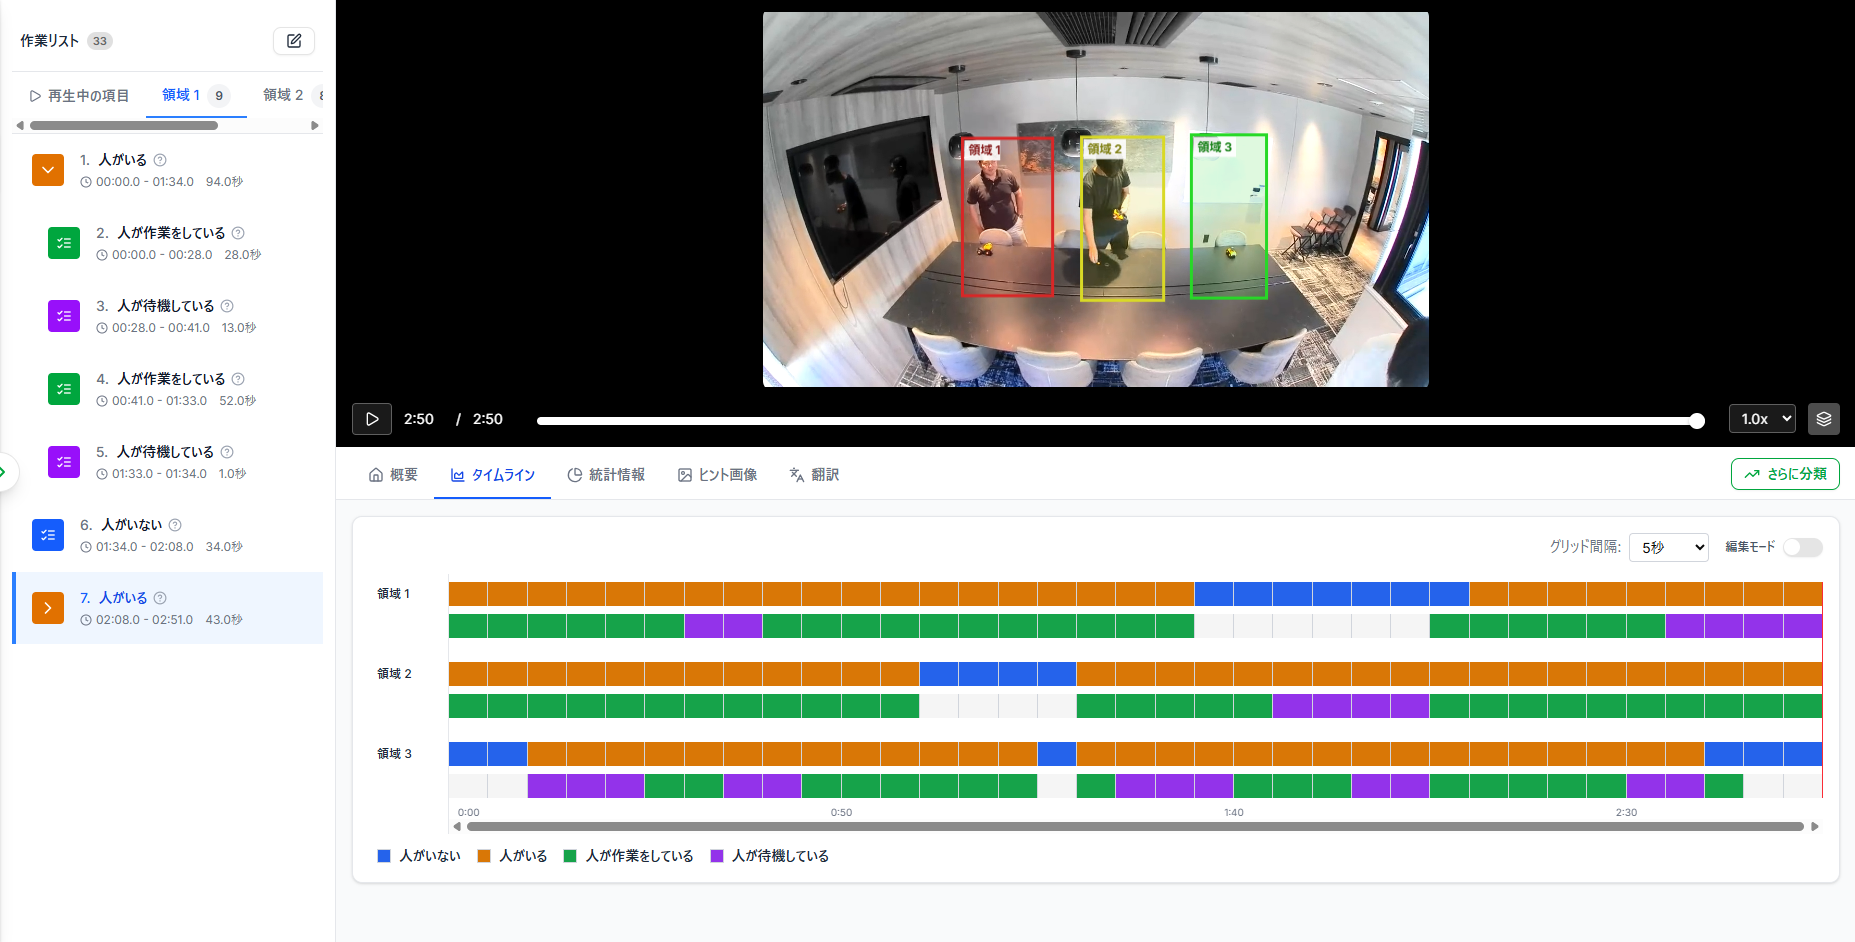
☝ While you can also create sub-categories directly from the analysis results screen, please note that this consumes tickets.
For more details, see:Performing Sub-Categorization
Showing Setup Instructions
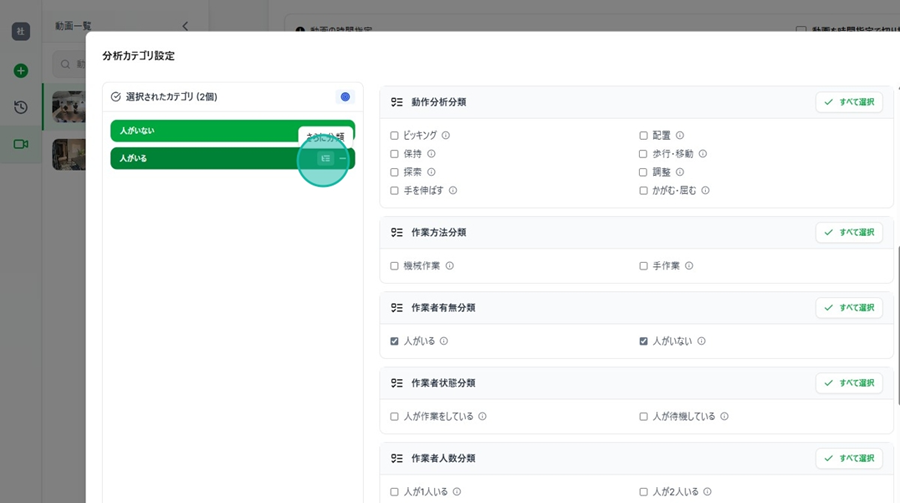
Step 1. Click the "Analyze Further" button to the right of the selected category.
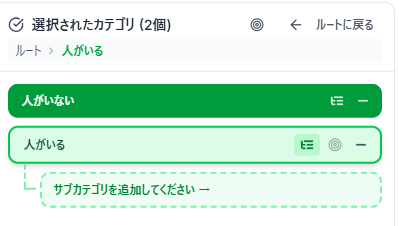
Step 2. The message "Please add a subcategory" will appear.
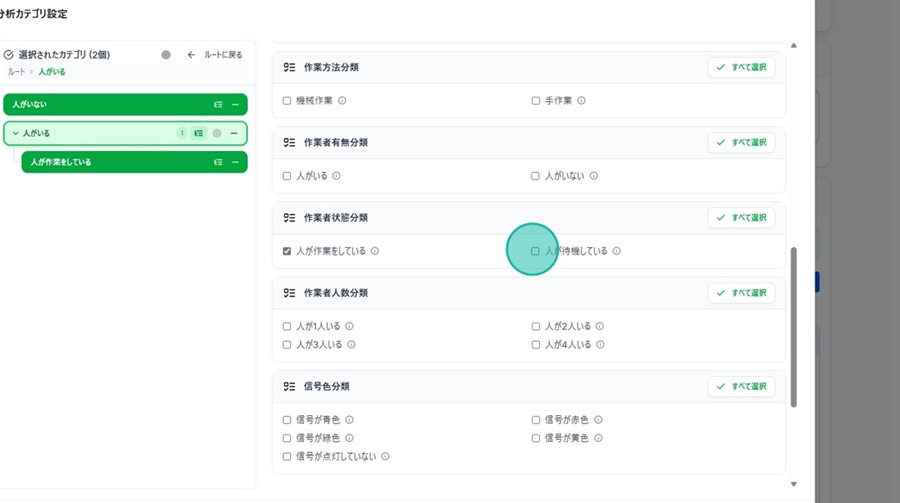
Step 3. Select the category you wish to add as a subcategory.
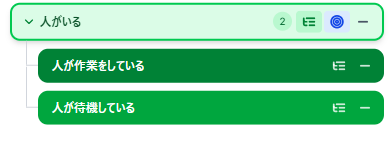
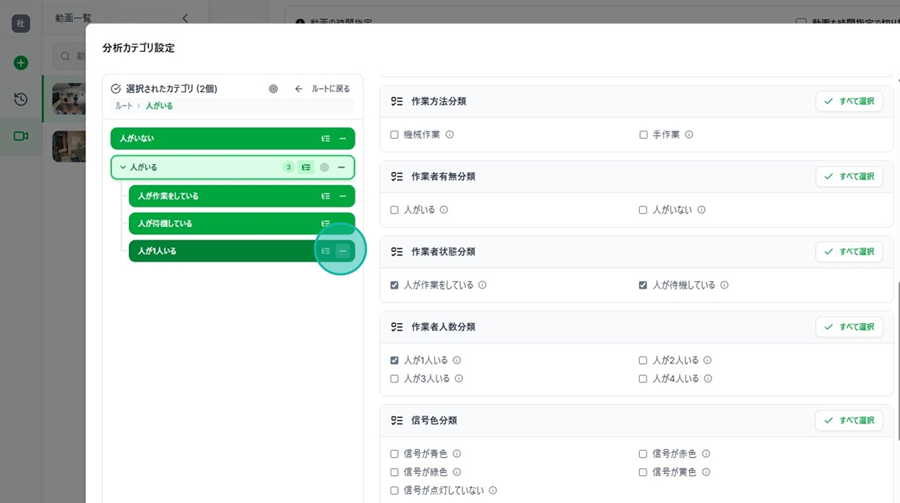
☝ You can remove a category by clicking the "-" (hyphen) button.