👉 You can create work manuals from videos using the Work Manual Generation function.
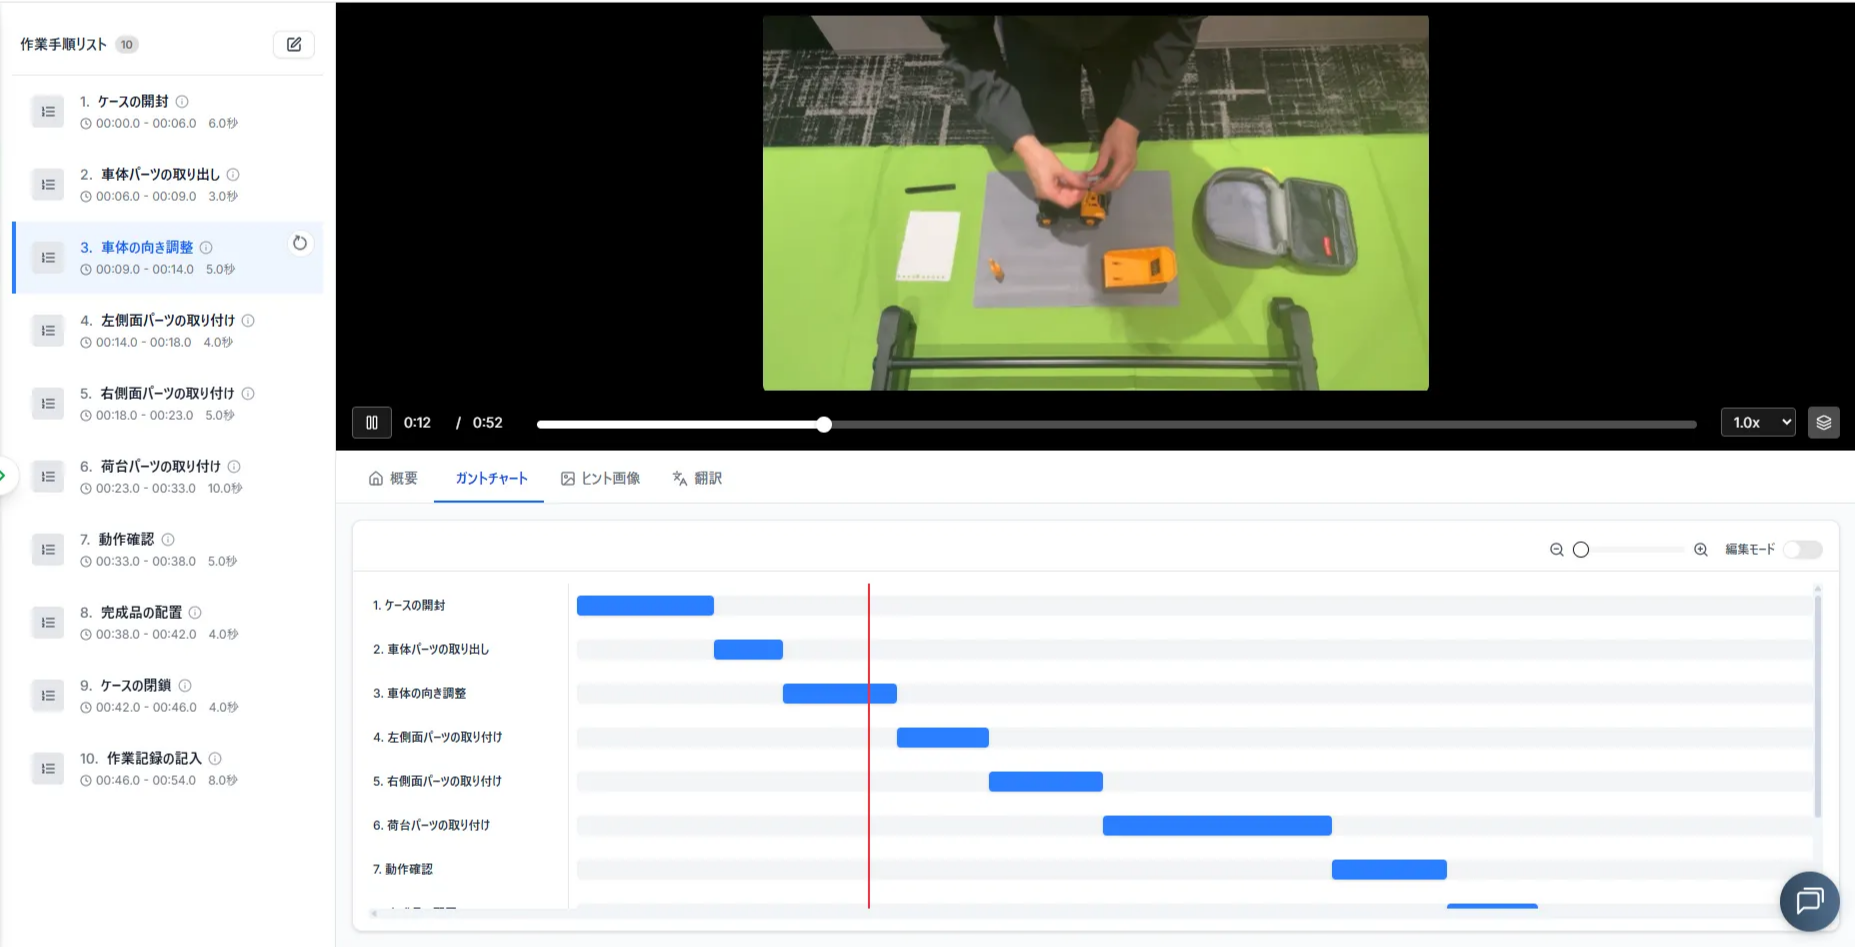
💡 Although some example images in this manual show the "Work Classification" screen, the "Work Manual Generation" function can be used in the same way.
Customizing Settings
👉 By customizing the settings, you can obtain the specific output you need with high precision.
Specifying the Video Duration
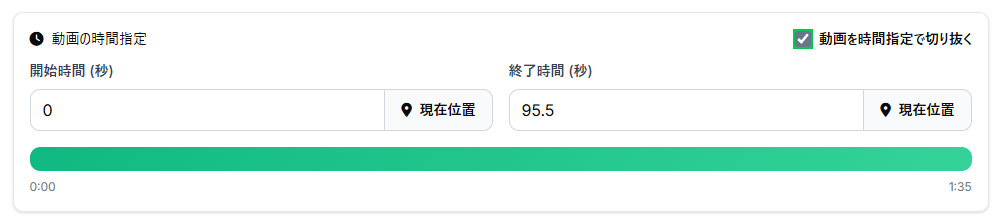
👉 You can trim the specific segment you want to analyze by specifying the video duration.
Displaying Setup Procedures
Step 1. Click the "Trim video by specifying time" box.
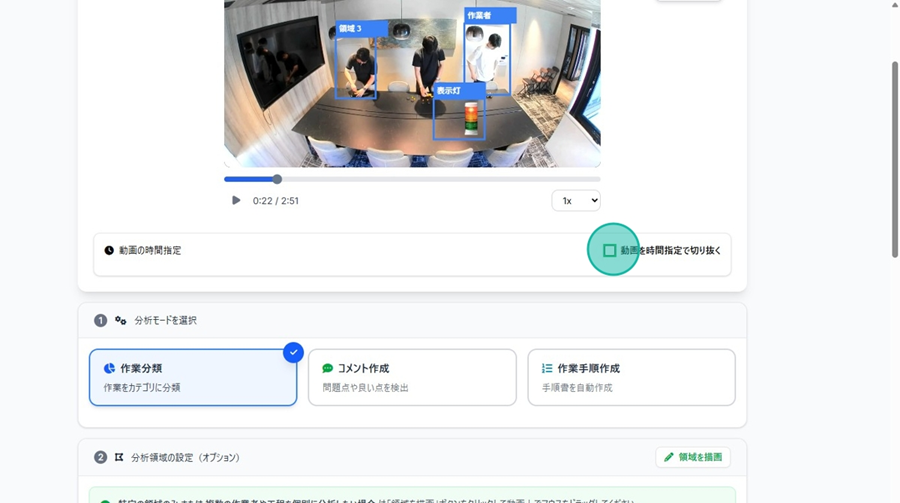
Setting while reviewing the footage
Step 2. Move the playback bar and stop at the point where you want the analysis to start.
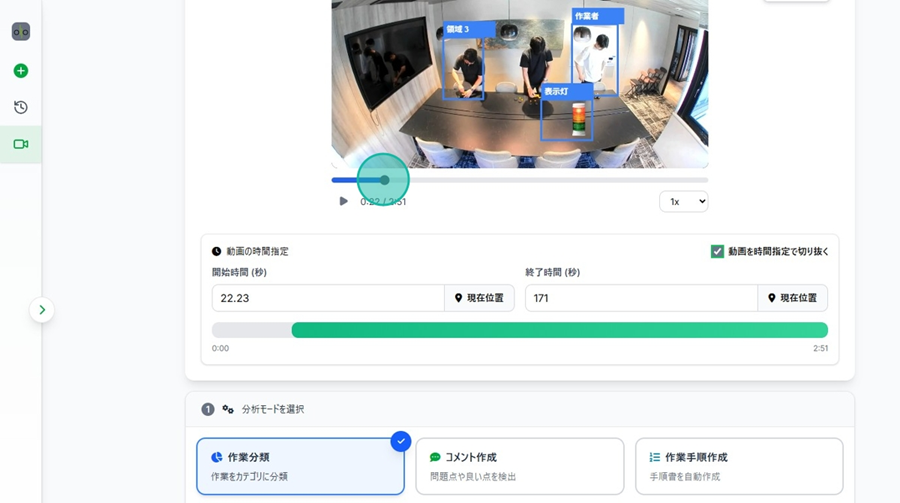
Step 3. Click "Current Position" to set the analysis start point.
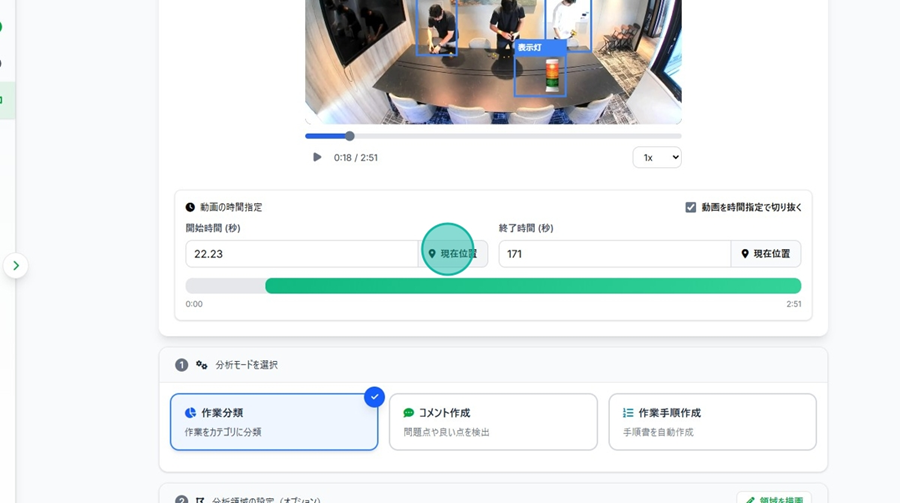
Step 4. Repeat the same process to set the end point.
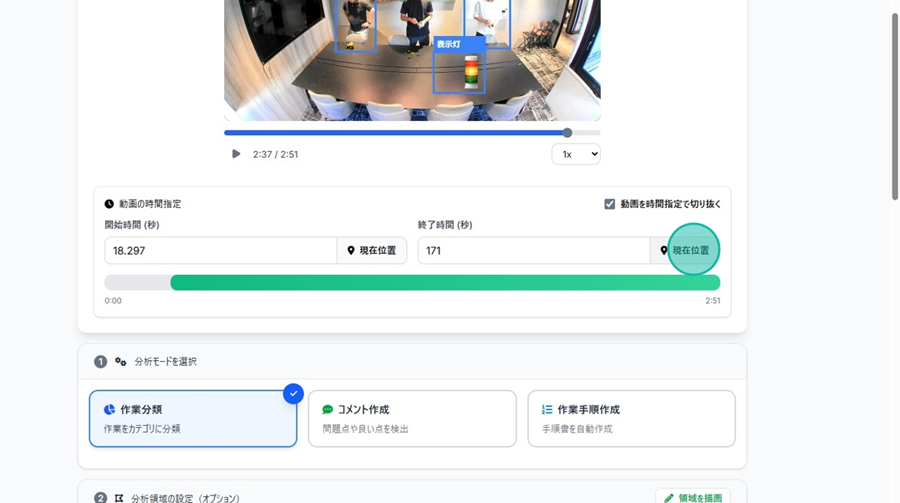
Setting by specifying seconds
Step 2. Click the field to enter specific seconds manually.
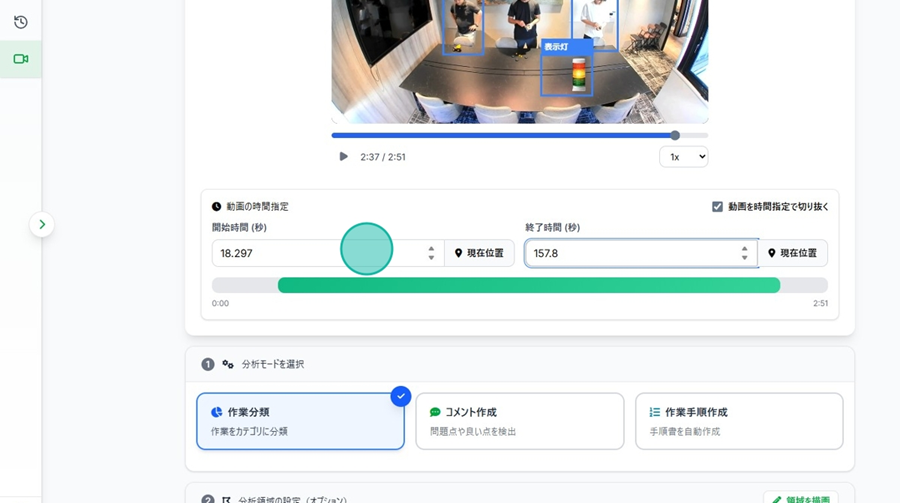
Step 3. Enter the Start Time and End Time.
Selecting Analysis Mode
- Select "Work Manual Generation."
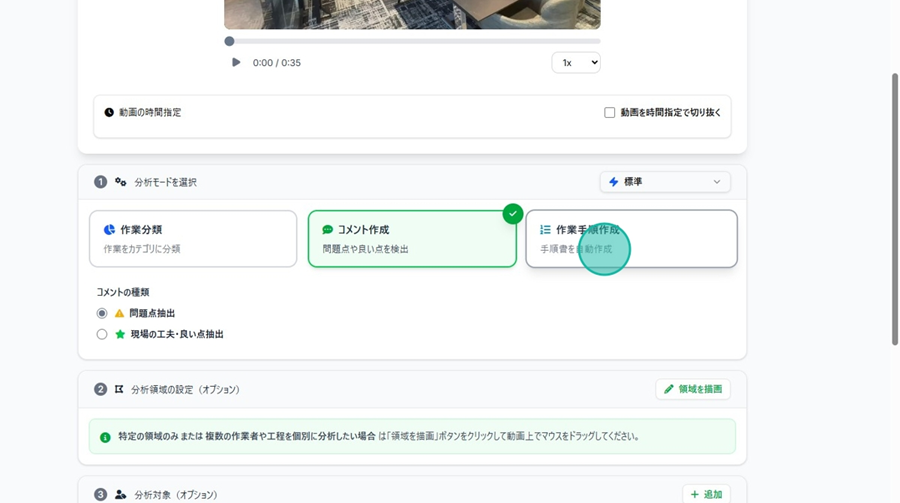
Using Already Existing Work Manuals
👉 If the work manuals are already determined, you can generate an output that matches those steps.
☝ If the sequence of procedures is fixed, click "Output in the same order as below" to apply the steps in the written order.
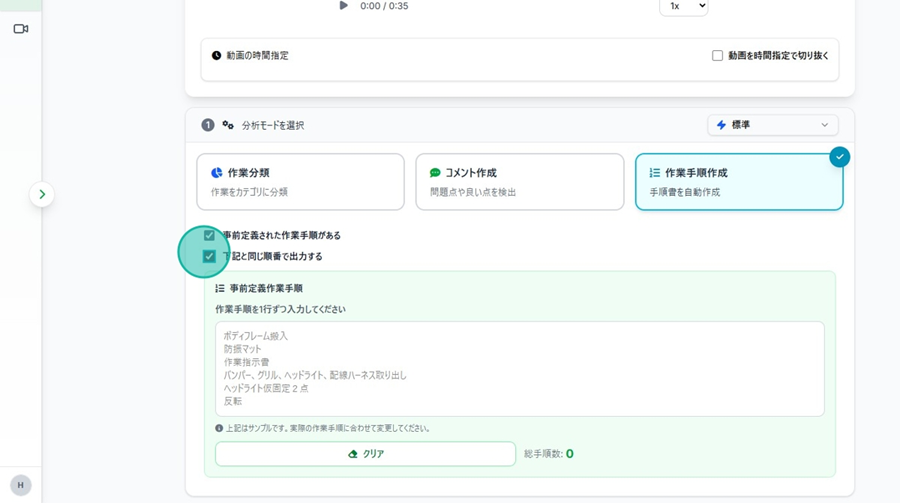
Displaying Procedures
Step 1: Click "Use a predefined work manual."
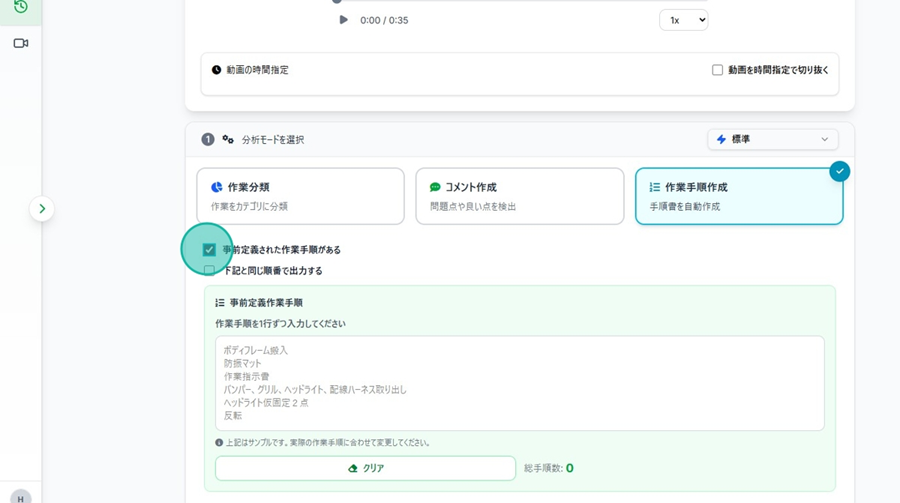
Step 2: Click the field where the example manual is shown in gray and enter your already existing work manual.
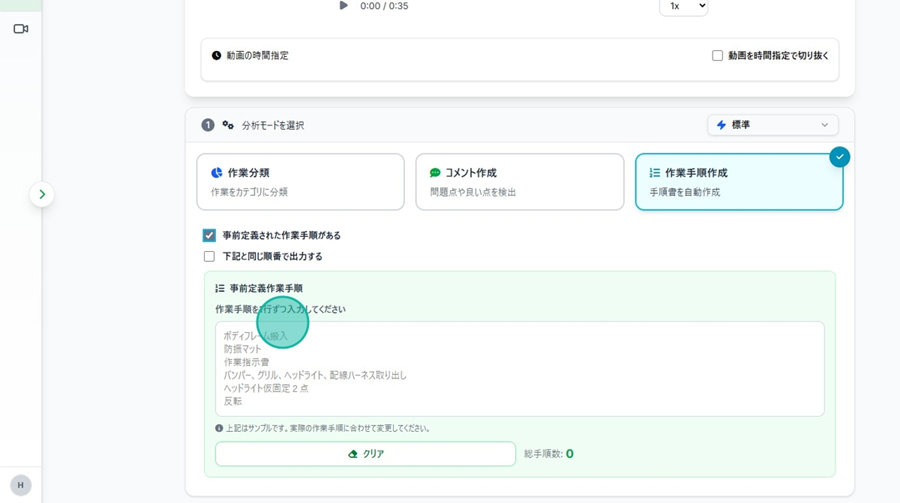
⚠️ Please ensure that each work procedure is entered on a separate line.
Selecting "Work Procedure Time Interval”
👉 This is useful when the tasks are extremely short or when the generated segments are too coarse.
Step 1. Click "Work Procedure Time Interval."
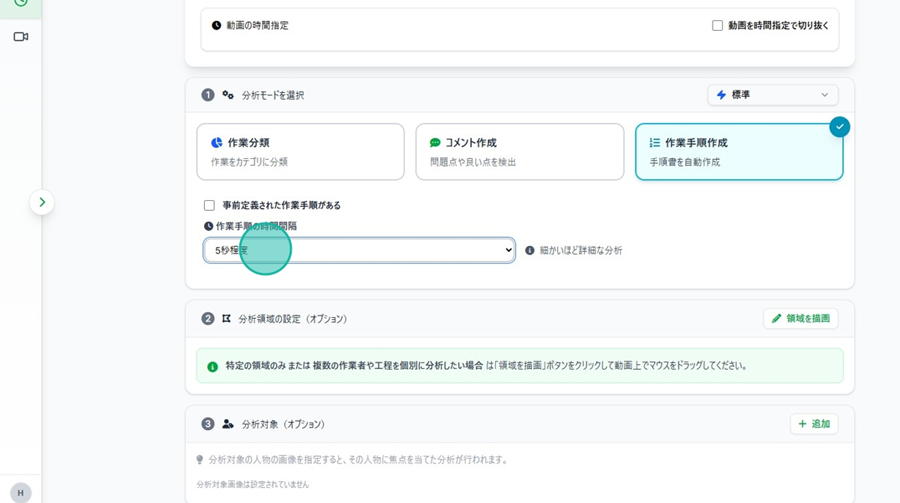
Step 2. Select the number of seconds from the dropdown menu according to the task.
Selecting Analysis Areas (Single/Multiple Area Analysis)
👉 Use this to specify a particular work area or analyze multiple areas. You can also apply different classifications to each area.
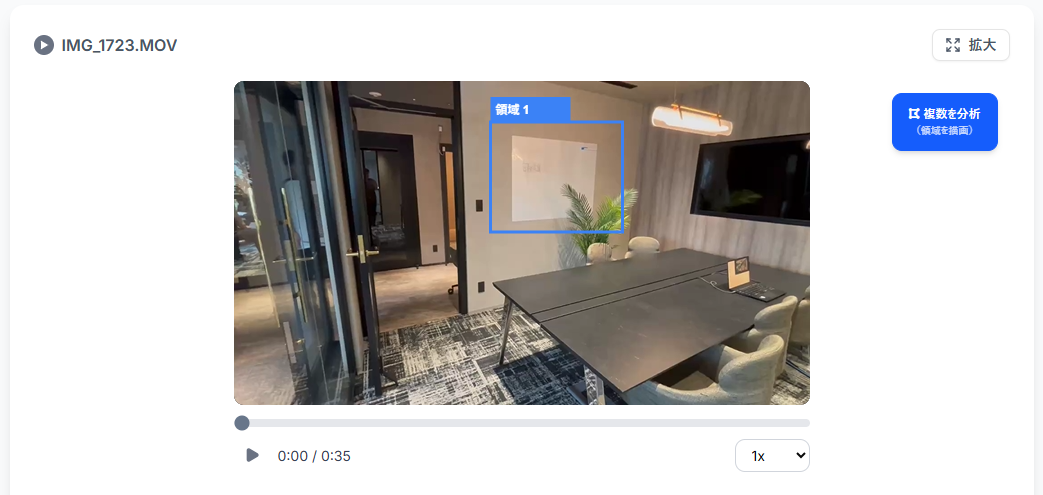
Specifying a Work Area (Single Area)
Step 1. Click "Draw Area."
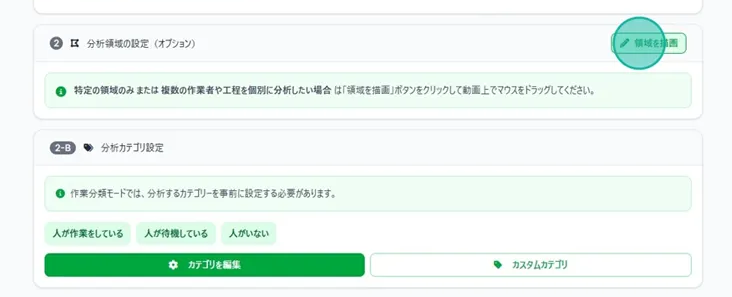
👍 You can also perform the same operation via the "Analyze Multiple" button on the right side of the video.
Step 2. Scroll up and move your mouse over the video.
Step 3. Click and drag the mouse to create a rectangular area.
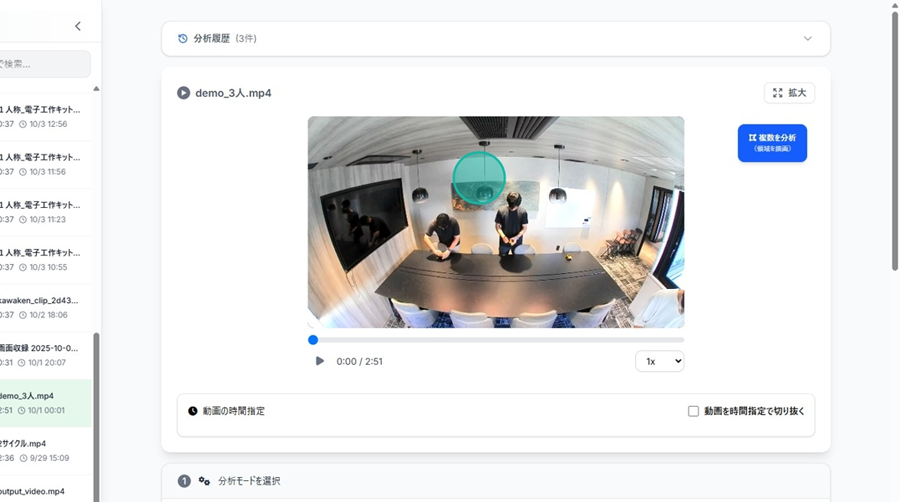
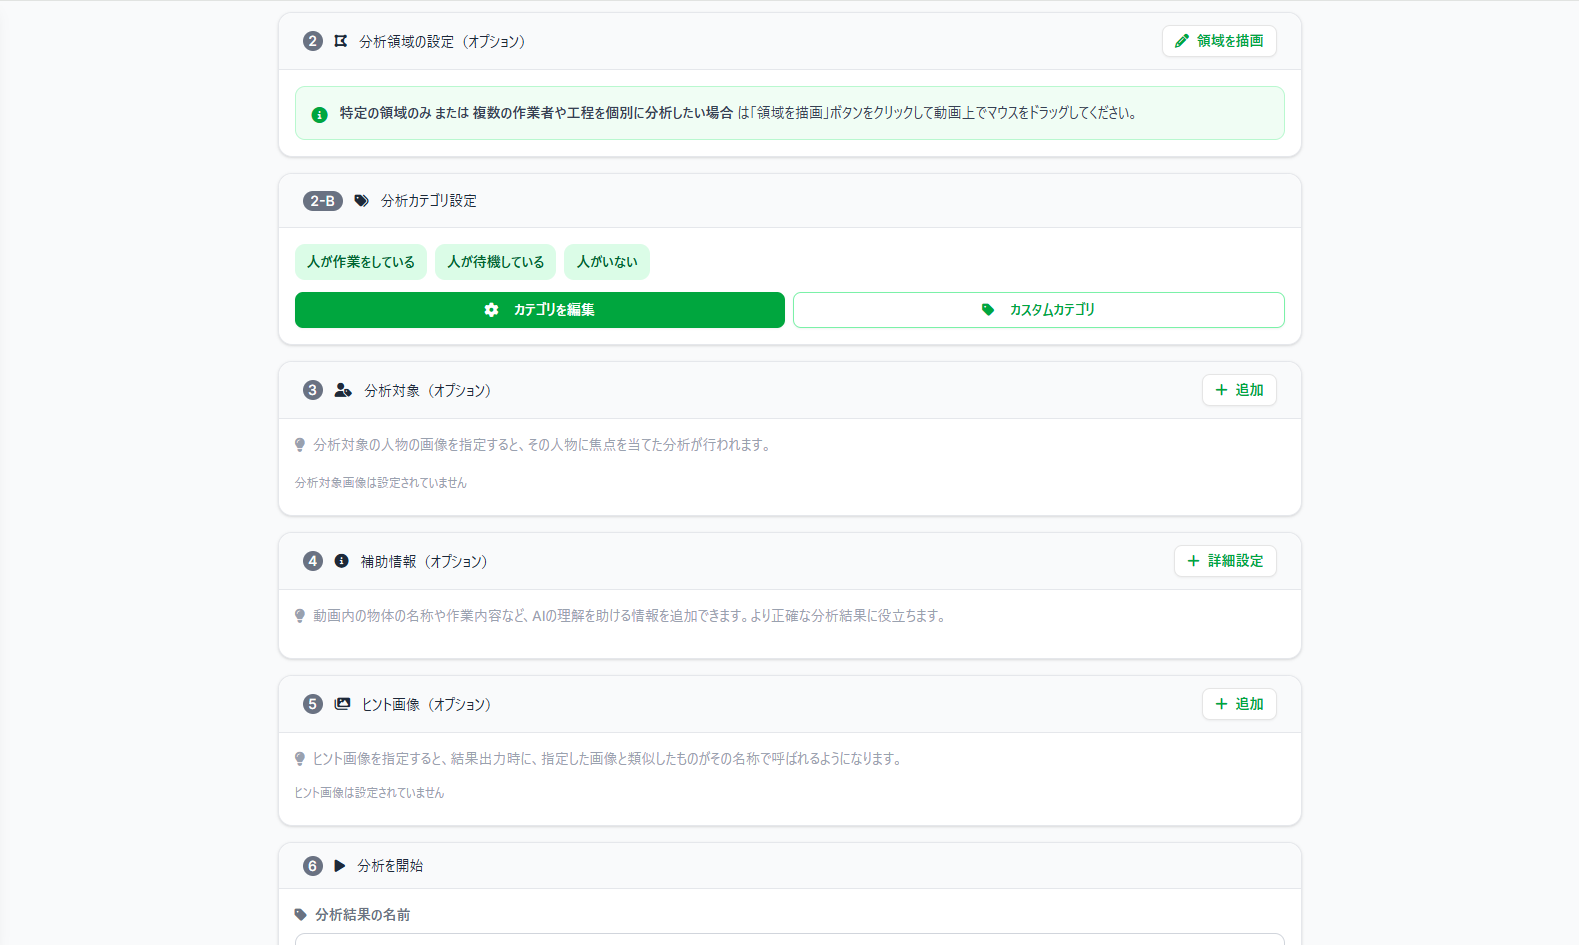
Step 4. Once the selection is complete, a capture and settings for the specified area will appear in the "Analysis Area Settings (Optional)" section.
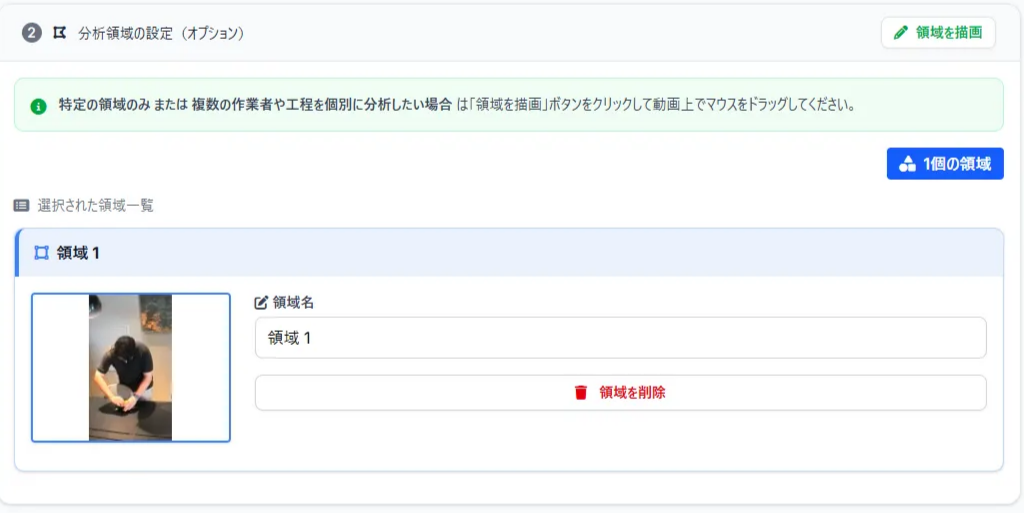
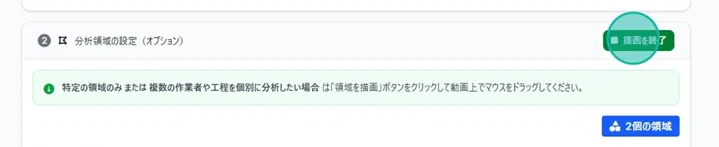
Step 5. Finish the area specification.
Specifying Work Areas (Multiple Areas)
Step 1. Click “Draw Area”.
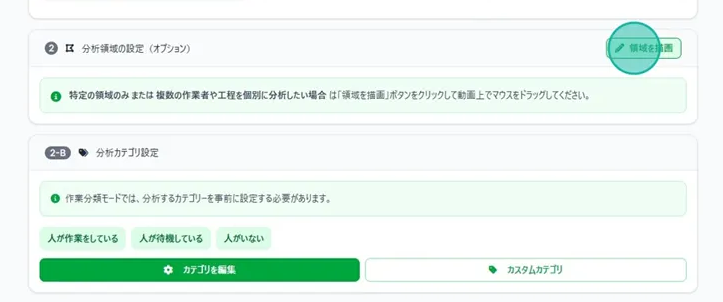
👍 You can also perform this action by clicking the Analyze Multiple button on the right side of the video.
Step 2. Scroll up and move your cursor over the video player.
Step 3. Click and drag your mouse to create a rectangular area.
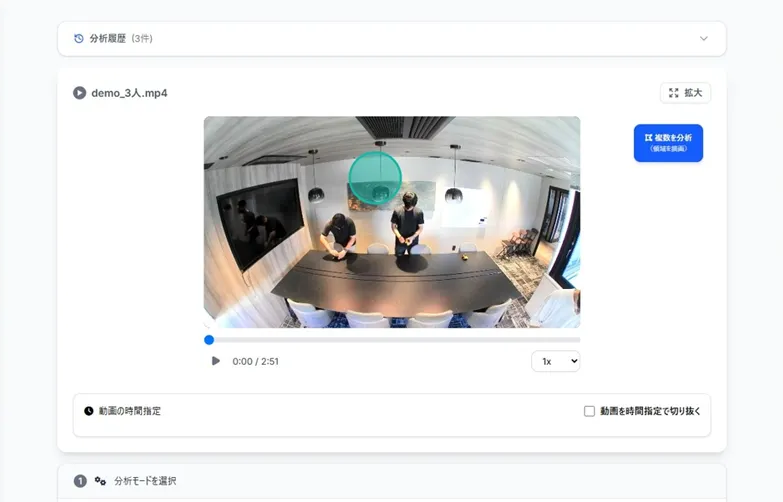
Step 4. Continue this process to define multiple areas as needed.
Step 5. Once the selection is complete, screen captures and configuration options for each specified area will appear under Analysis Area Settings (Optional).
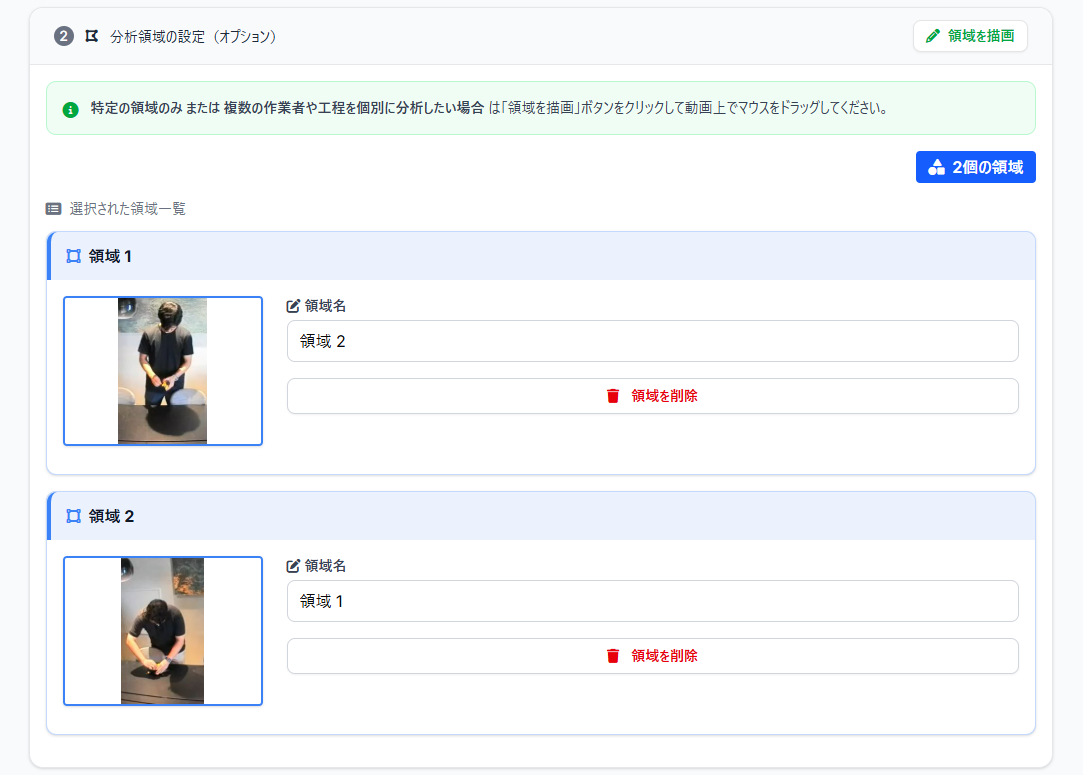
Step 6. Click “Finish Drawing” to exit the area selection mode.

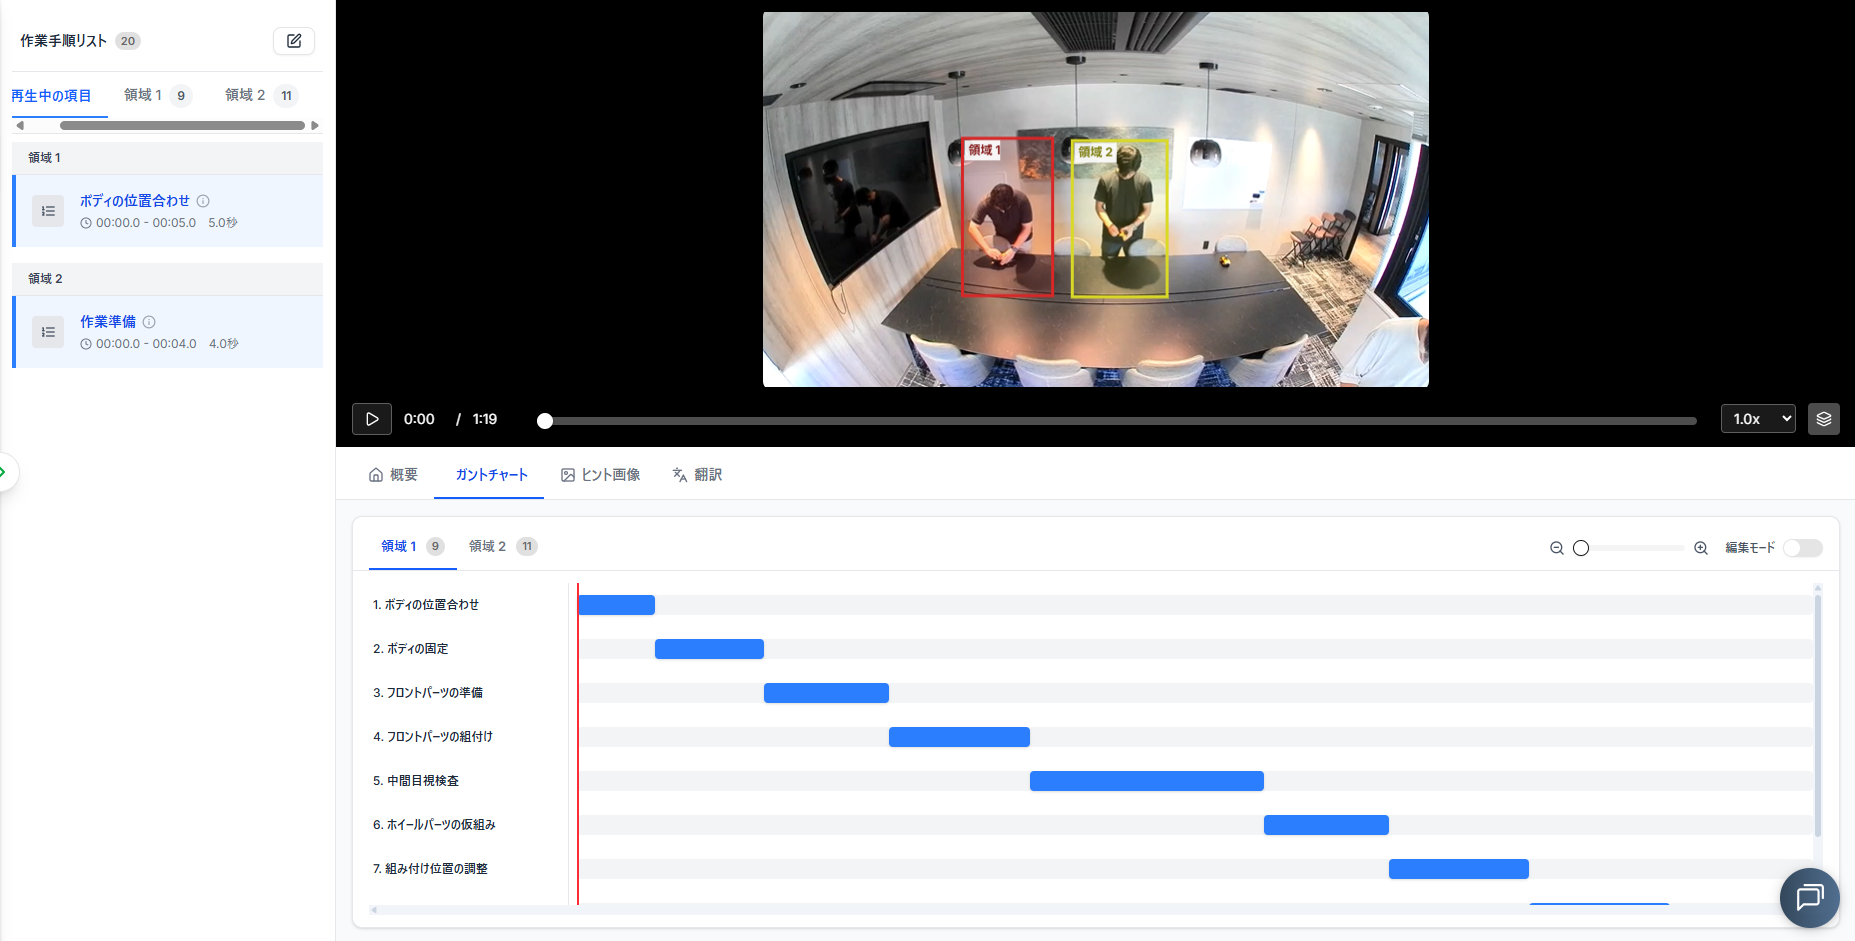
☝ The results for "Work Manual Generation" with multiple areas will look like this
View Analysis Result Example
Setting the Analysis Target
👉 By specifying an analysis target, the AI will focus its analysis on that specific person.
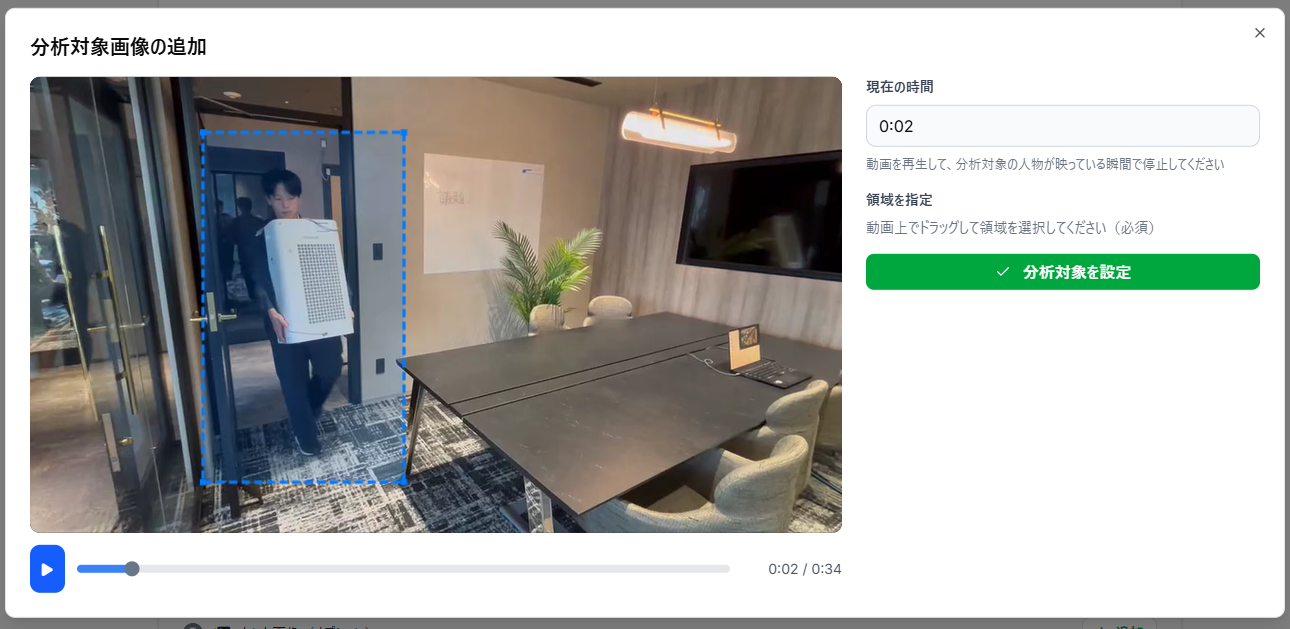
Setup Method
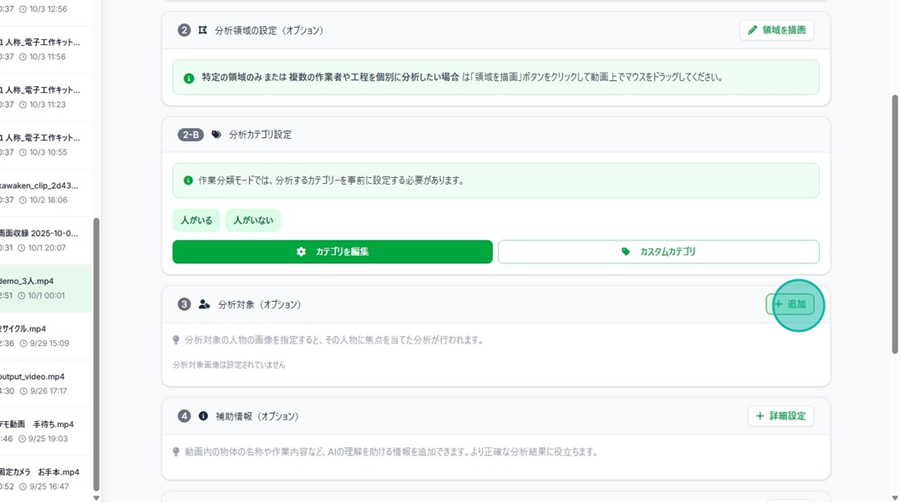
Step 1. Click "+ New" on the right side of the Analysis Target column.
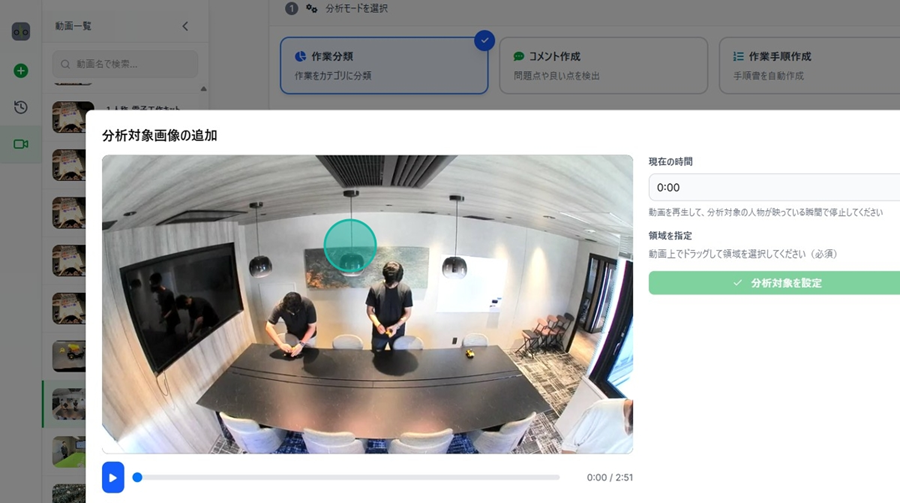
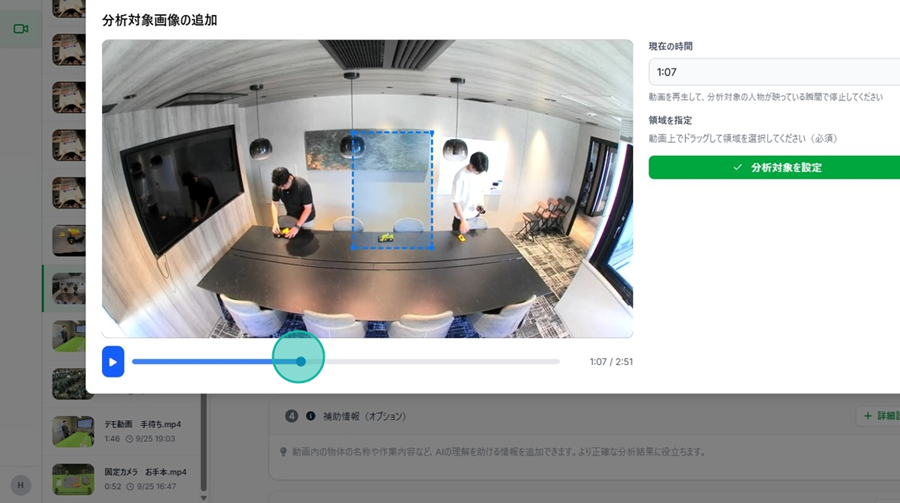
Step 2. Click and drag the mouse over the video to create a rectangular area.
Step 3. If necessary, adjust by moving the playback bar.
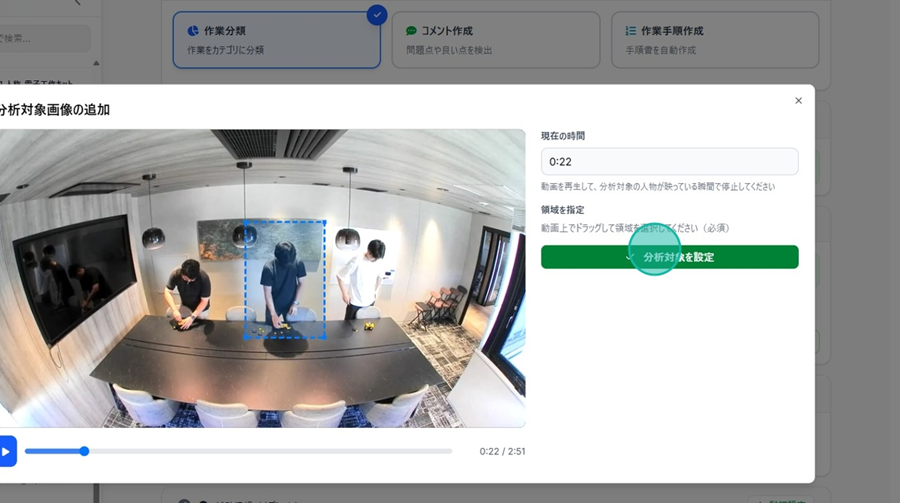
Step 4. Click "Set Analysis Target."
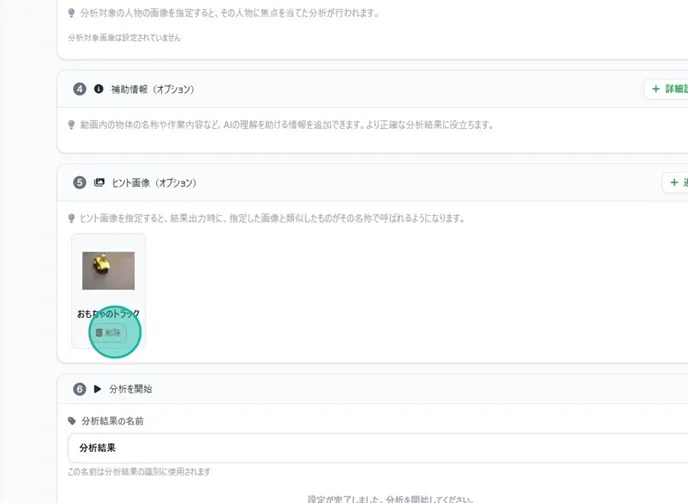
👉 You can also delete it by clicking "Delete."
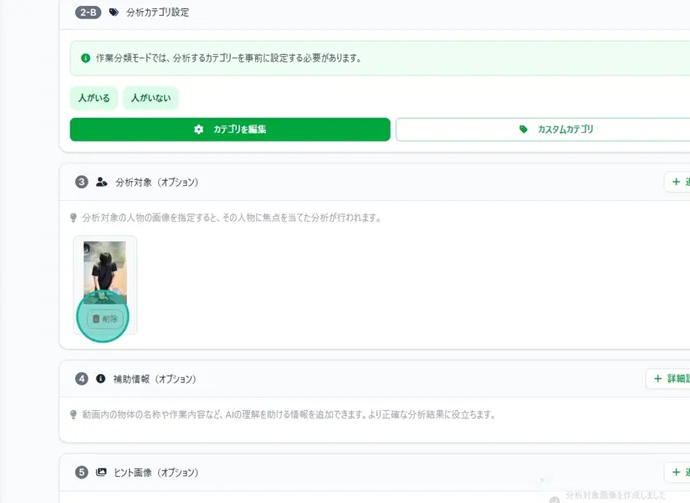
Setting Supplementary Information
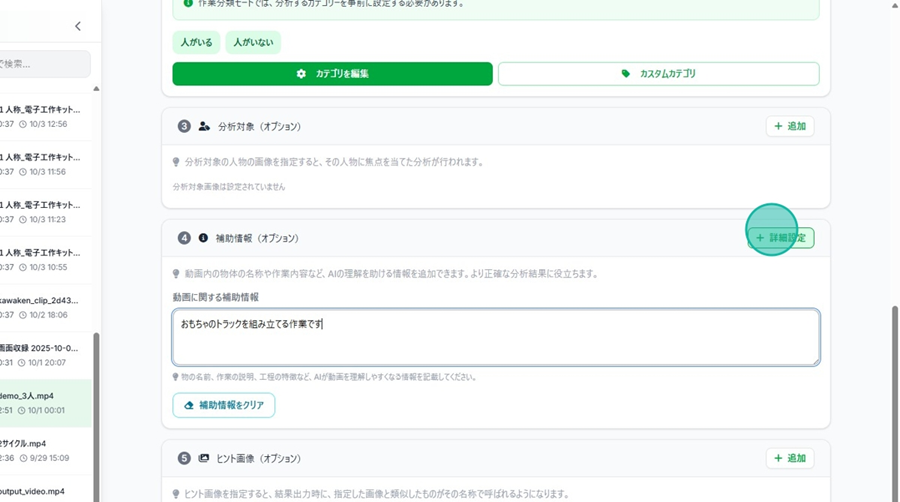
👉 You can freely add information to help the AI understand the context, such as names of objects in the video or details of the work. This helps achieve more accurate analysis results.
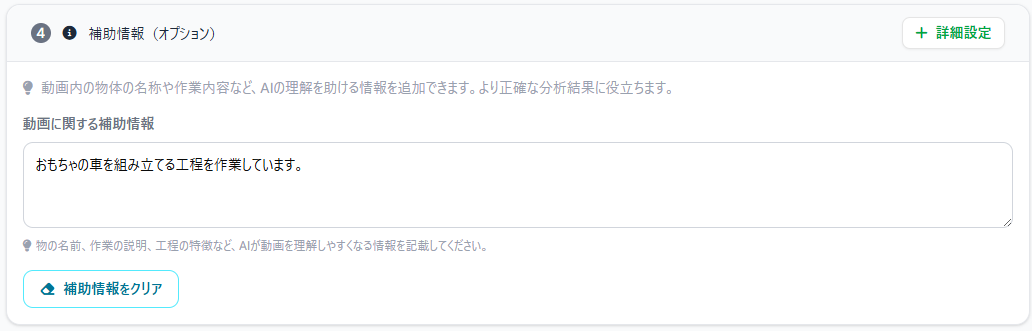
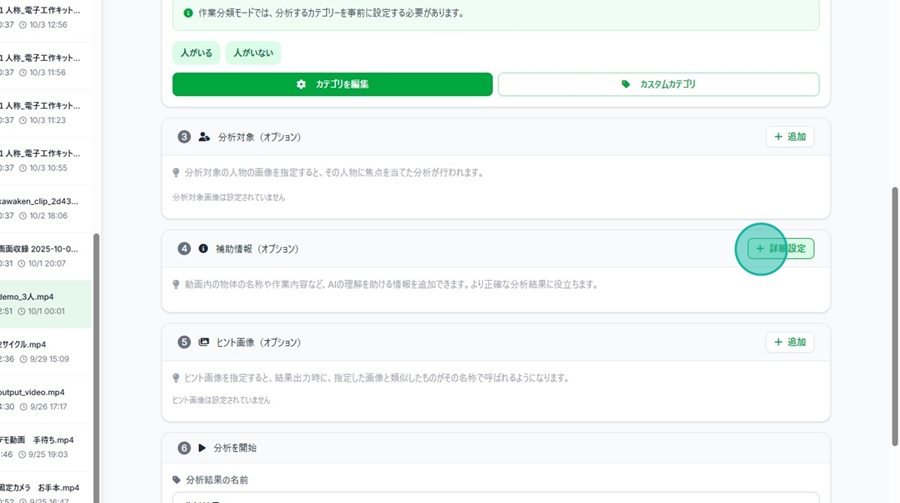
Displaying Setup Procedures
Step 1. Click "+ Advanced Settings" on the right side of the Supplementary Information column.
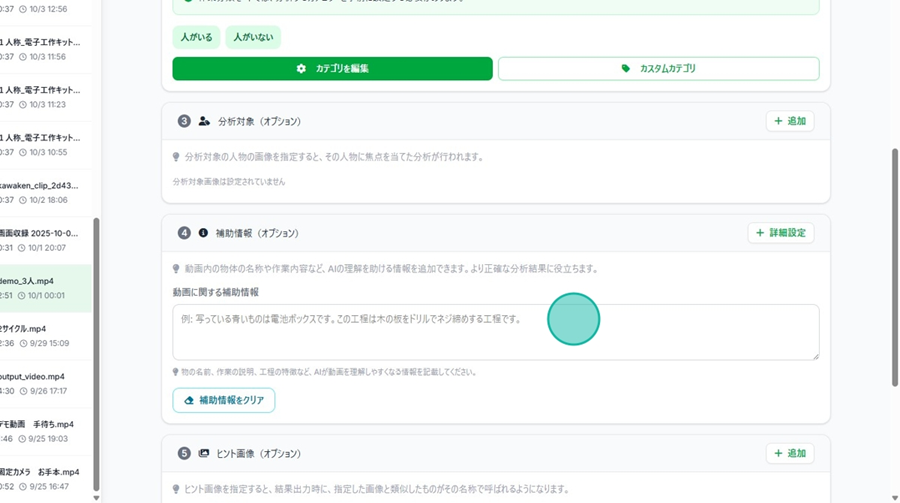
Step 2. Click the "Supplementary information about the video" field and enter the details.
Step 3. Click "Advanced Settings" to finish editing.
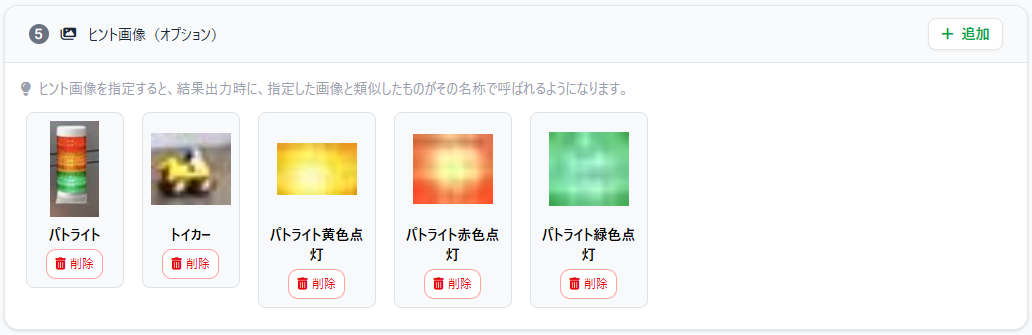
Setting Hint Images
👉 By specifying hint images, objects similar to the specified image will be identified by that name in the output results.
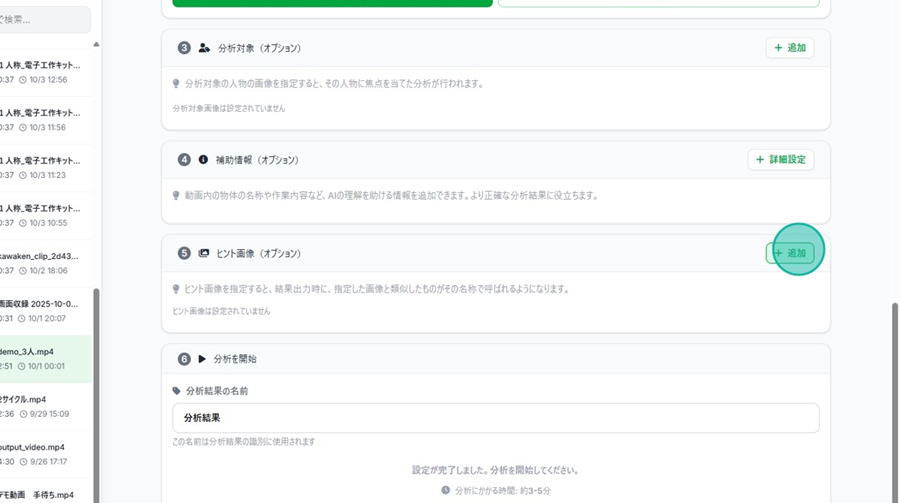
Setup Method
Step 1. Click "+ New" on the right side of the Hint Image column.
Step 2. Click and drag the mouse over the video to create a rectangular area.
You can also adjust this by moving the playback bar if needed.
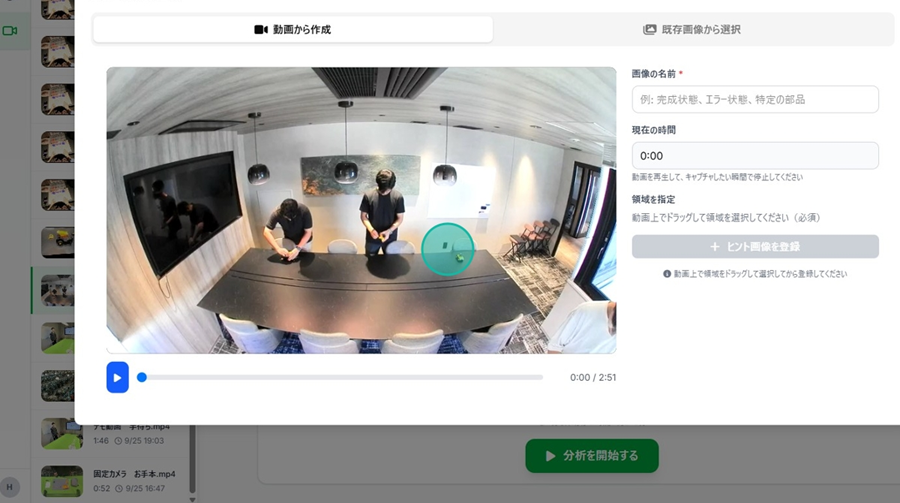
Step 3. Edit the name of the image.
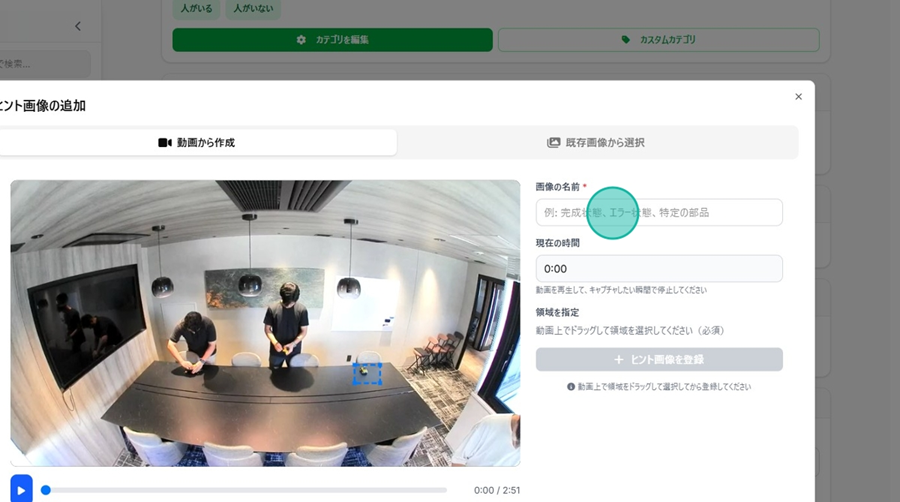
Step 4. Click "Register Hint Image."
☝ Multiple images can be registered consecutively.
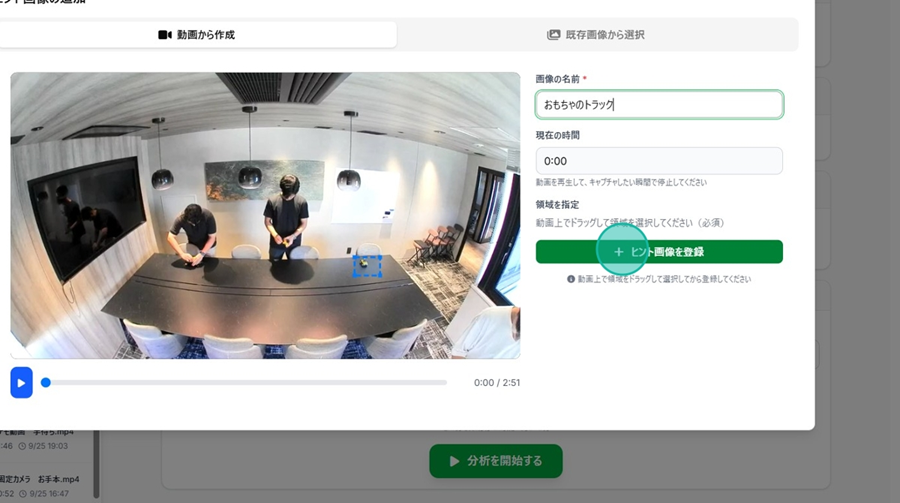
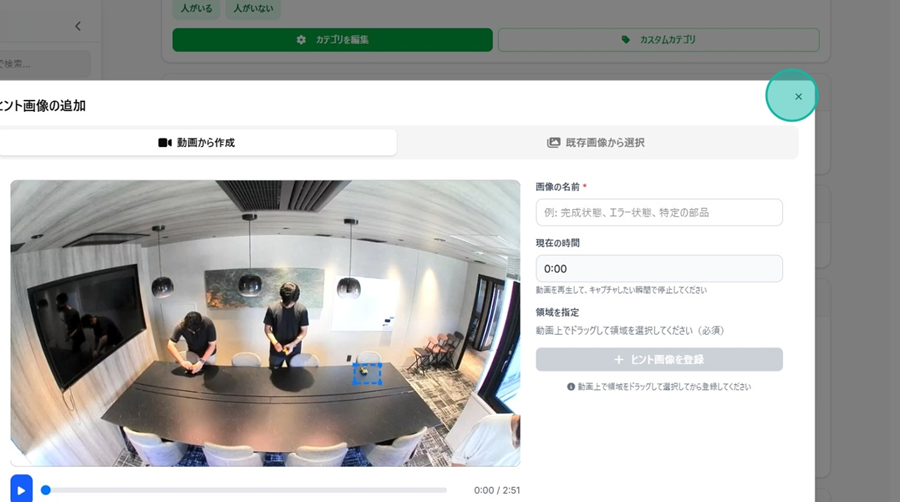
Step 5. Press the "×" button to finish registration.
👉 You can also delete images by clicking "Delete."
Naming the Analysis Result
👉 You can set a custom name for the analysis result.
Displaying Setup Procedures
Click the "Analysis Result Name" field in the Start Analysis section to edit the name.
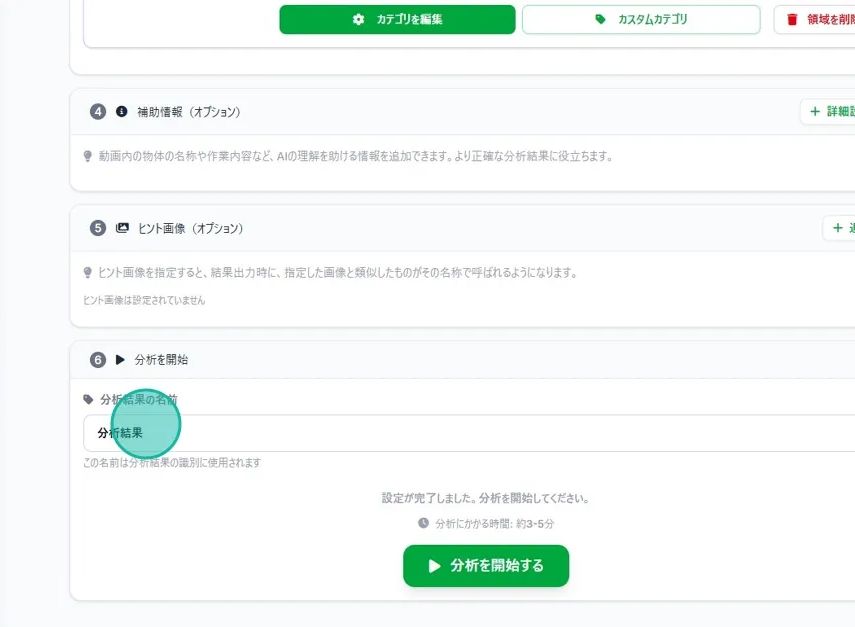
☝ The name registered here will be used in the comparison list.
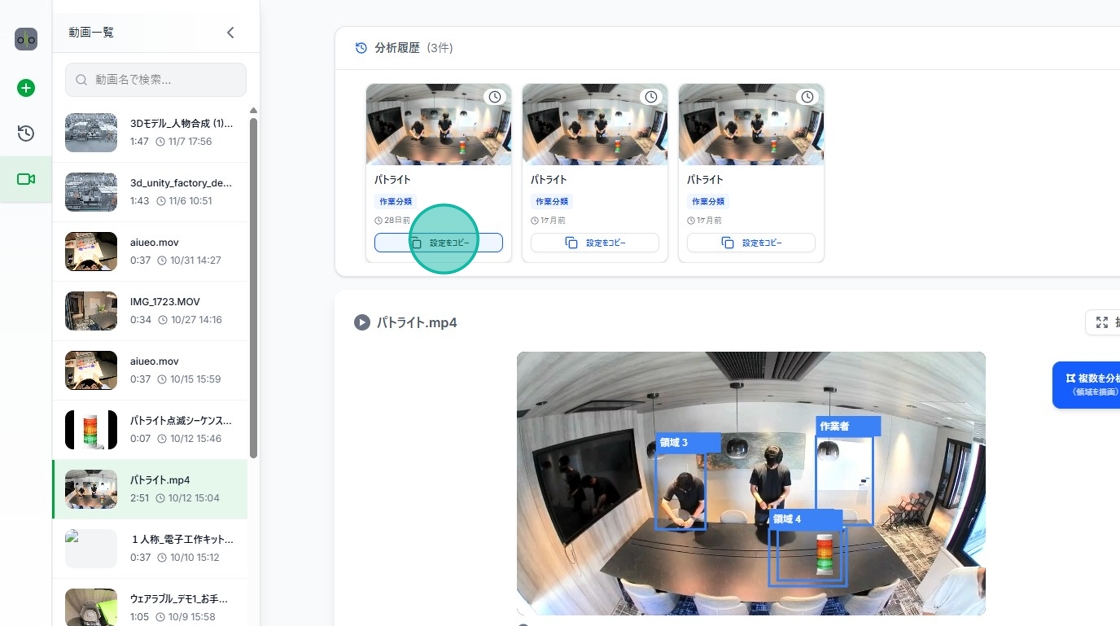
Viewing Analysis History (For second time onwards)
👉 You can review past analysis results from the same video or copy previous settings.

Displaying Setup Procedures
Step 1. Scroll up and click "Analysis History."
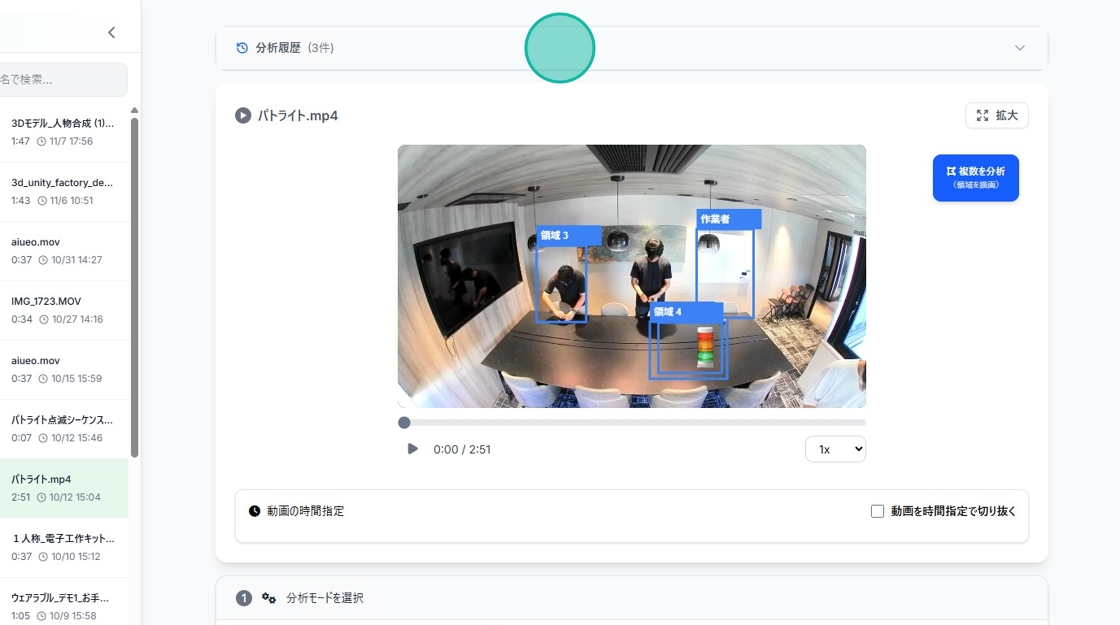
Step 2. Click "Copy Settings" to carry over the settings used in that specific analysis.